How to install diff breathers and why they’re so important
When was the last time you gave a thought to your diffs? Here's how to install diff breathers and why they're so important
Published on: 12 January 2024
Advertisement
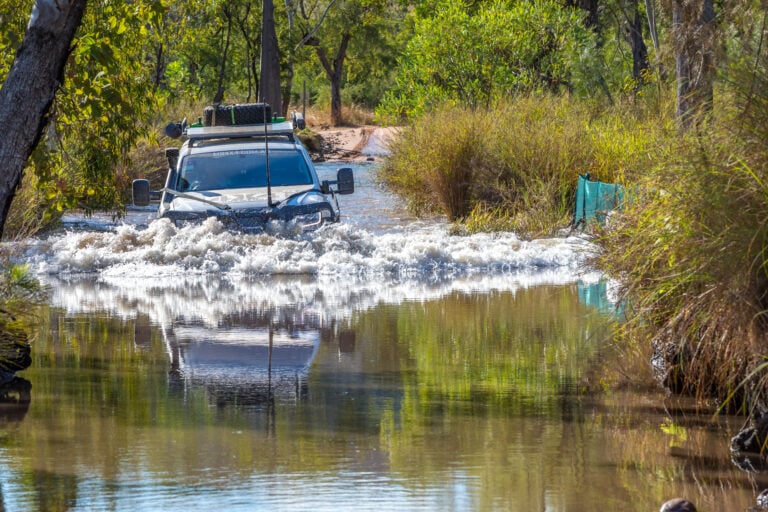
We run snorkels to look after our engines when crossing rivers, but when was the last time you gave a thought to your diff breathers? Here’s how to install diff breathers and why they’re so important.
Despite the street-cred. A four-inch stainless steel snorkel gives you, not sucking down a gutful of water into the engine is the main reason many of us run snorkels. But how many of 4×4 owners have actually fitted diff breathers? Sure, a rebuild isn’t quite as expensive on a diff as it is an engine, but if you can prevent your diff from sucking a bucket-load of water into the housings by spending less than $100 and fitting it in your lunch break you’d be silly not to, right?
From factory, your differentials are fitted with breather valves. They vent the pressure build up from inside the diff when they get hot. An aftermarket breather kit’s main job is to raise your breather above the factory levels (usually up much higher somewhere on your firewall). On my Toyota 80 Series, the factory diff breathers only go as high as the chassis rails. So as soon as your chassis is underwater, it’s all bad news. The Volkswagen Amarok we installed this kit on has a claimed wading depth of 500mm with factory breathers, but chances are you’ll face some trouble with water levels above the wheels.
Where raised breathers become important, is when you’re trundling along with the short-stick locked in causing everything in your driveline to heat up. Wheel bearings, axles, CVs, diff centres, pinions – the works. As the air in your diff housings heats up, it expands, and pressurises the diff. The breather lets it release this pressure out into the atmosphere, instead of out via your axle seals.
So far, so good. So why would you want raised diff breathers? Because invariably, there’s going to be a water crossing, river, or boat ramp that you’ll want encounter during your travels. If you’re anything like me, you’re not going to want to sit there for hours waiting for your driveline to cool down before you get your hubs wet. As we said before, when the driveline gets hot, it vents air out. When it cools down, it sucks air back in. If your diffs are hot and the breather goes underwater, it is going to suck litres of water through the breather. In some cases, breathers have a one-way valve that closes when the pressure flips. In this case that water can be sucked in through your axle or pinion seals.

I shouldn’t need to tell you why that’s bad. Have a gander at the photo above. That’s what your crown wheel and pinion will look like when there’s more water in your diff than oil. Ouch. We’re only touching on diff breathers here, however the same theory applies to your gearbox and transfer case. That said, the factory breathers for those are usually a fair bit higher than the diffs. Same idea applies, and chances are, you’ll be able to get a four-way kit that will do the lot. Now you know the why, let’s go over how easy it is to fit.
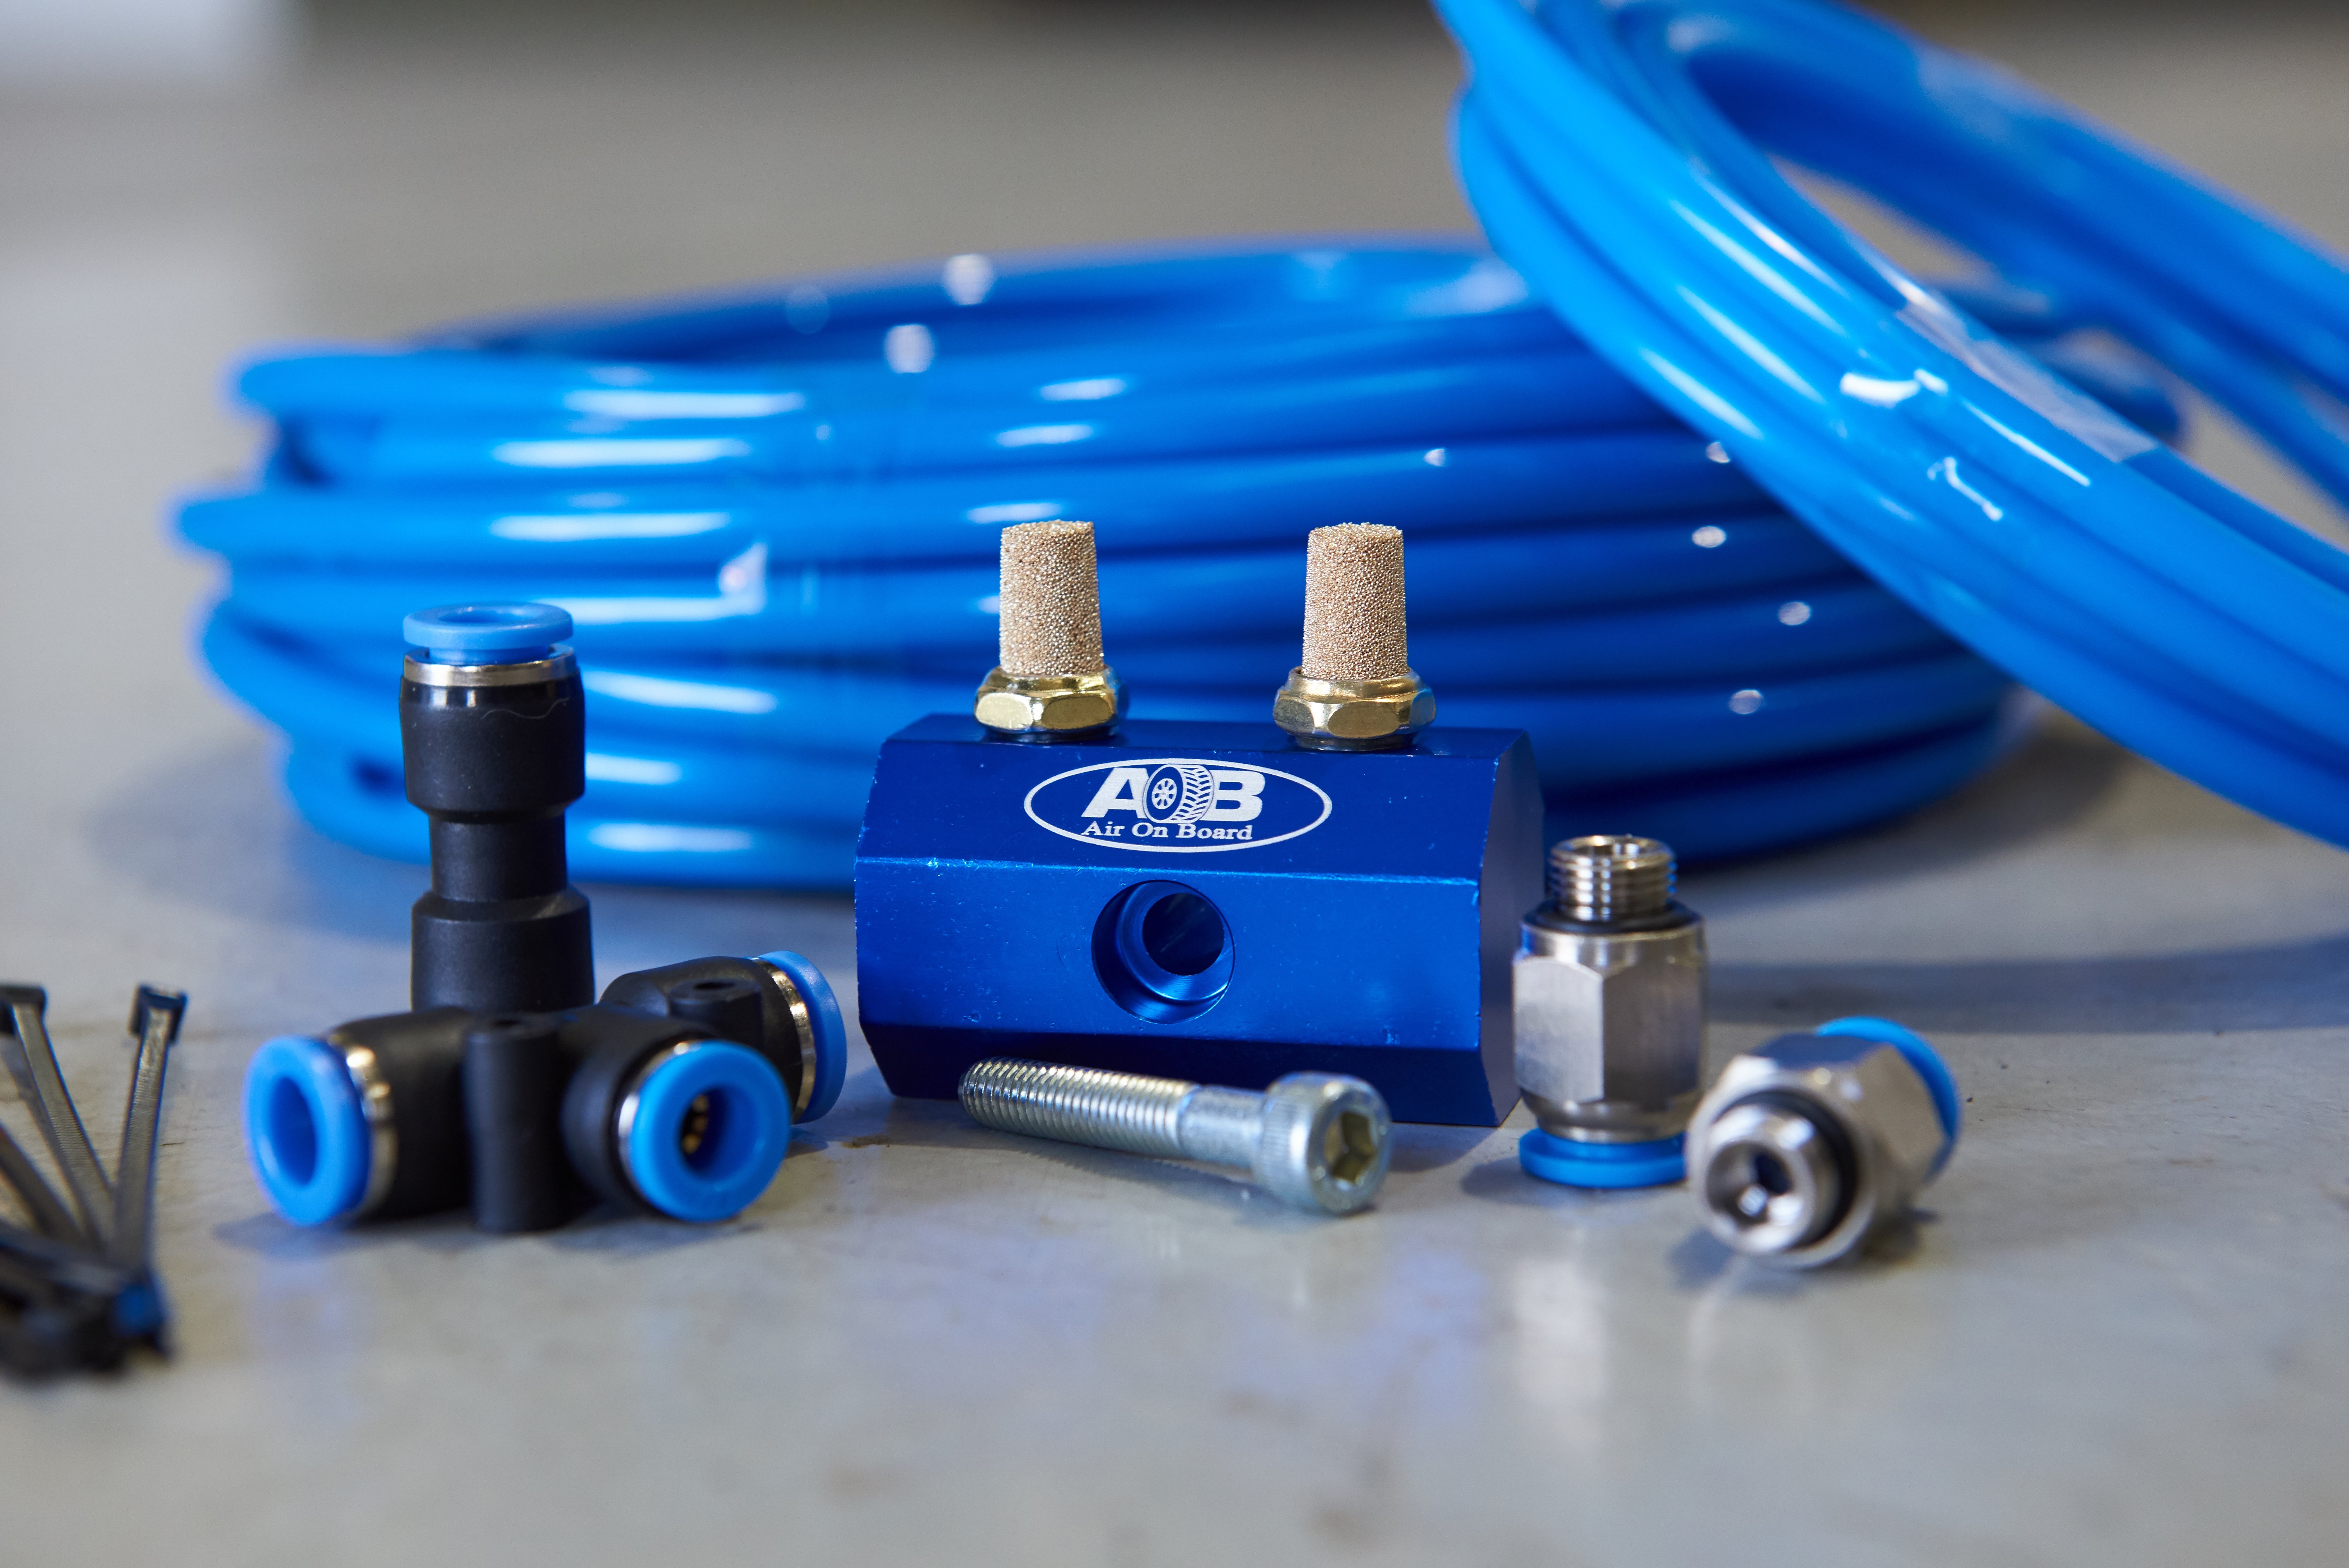
The Amarok we installed the breathers into has a specific kit bought from the folks over at Air On Board (AOB). Other than the kit, we just needed a spanner, an Allen Key, a sharp blade and some side cutters to cut off the zip-tie tails. The whole kit cost just $83.50, and has an extra line and T-piece to extend the transfer case breather too. What you get in the kit will depend on what’s needed for your specific vehicle. Make sure you get the right one for your rig.
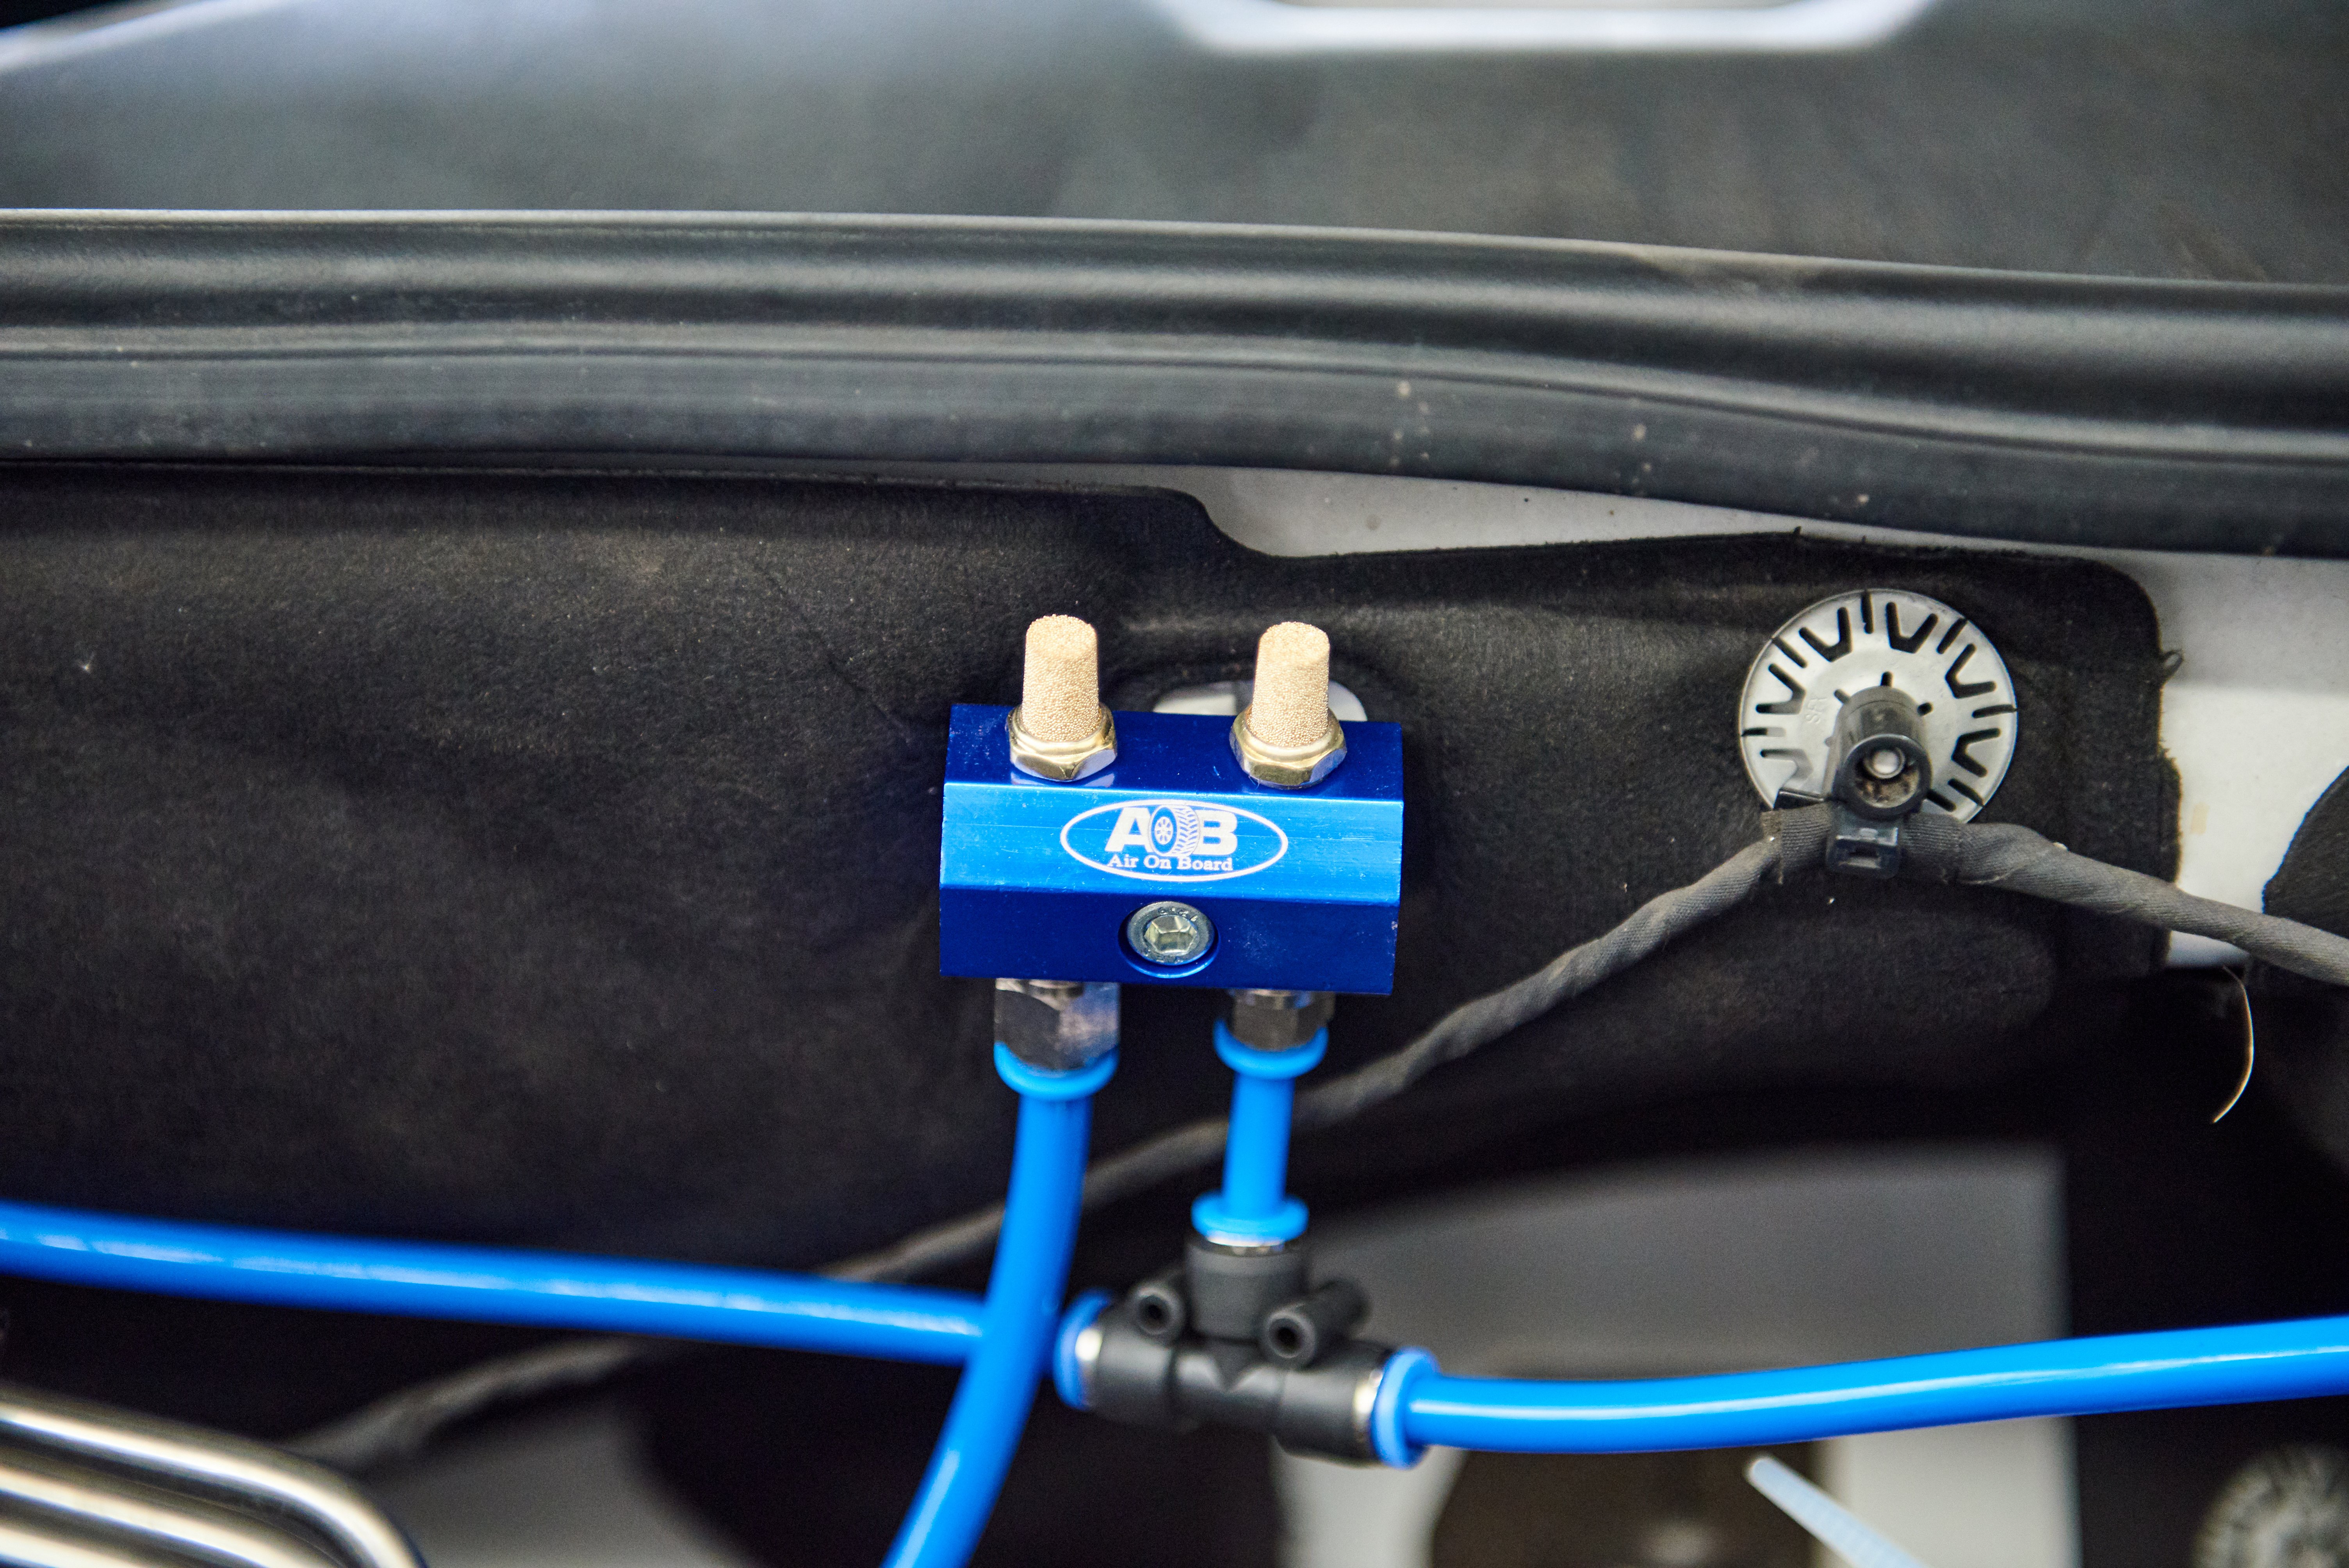
That said, my 80 just runs the ‘Universal’ kits. If they don’t list your vehicle, chances are it’ll run the universal kit. If you’re not sure, give the guys at AOB a call and ask. They’ll be more than happy to help you out. In the Amarok kit, was the blue anodised two-port breather head with filters, two lengths of hose matched to the ‘Rok, a couple of joiners and a T-piece, as well as a handful of small zip-ties.
First thing’s first; read the instructions! The AOB kit came with some rather straightforward instructions on what to do. Should you get a generic kit, or want to run your own, we’ll run through what we did on this Amarok. If you are not comfortable working on your own vehicle there are plenty of professionals out there that will do this modification for you. Every car is different and note we have the luxury of the Unsealed 4X4 Garage hoist.
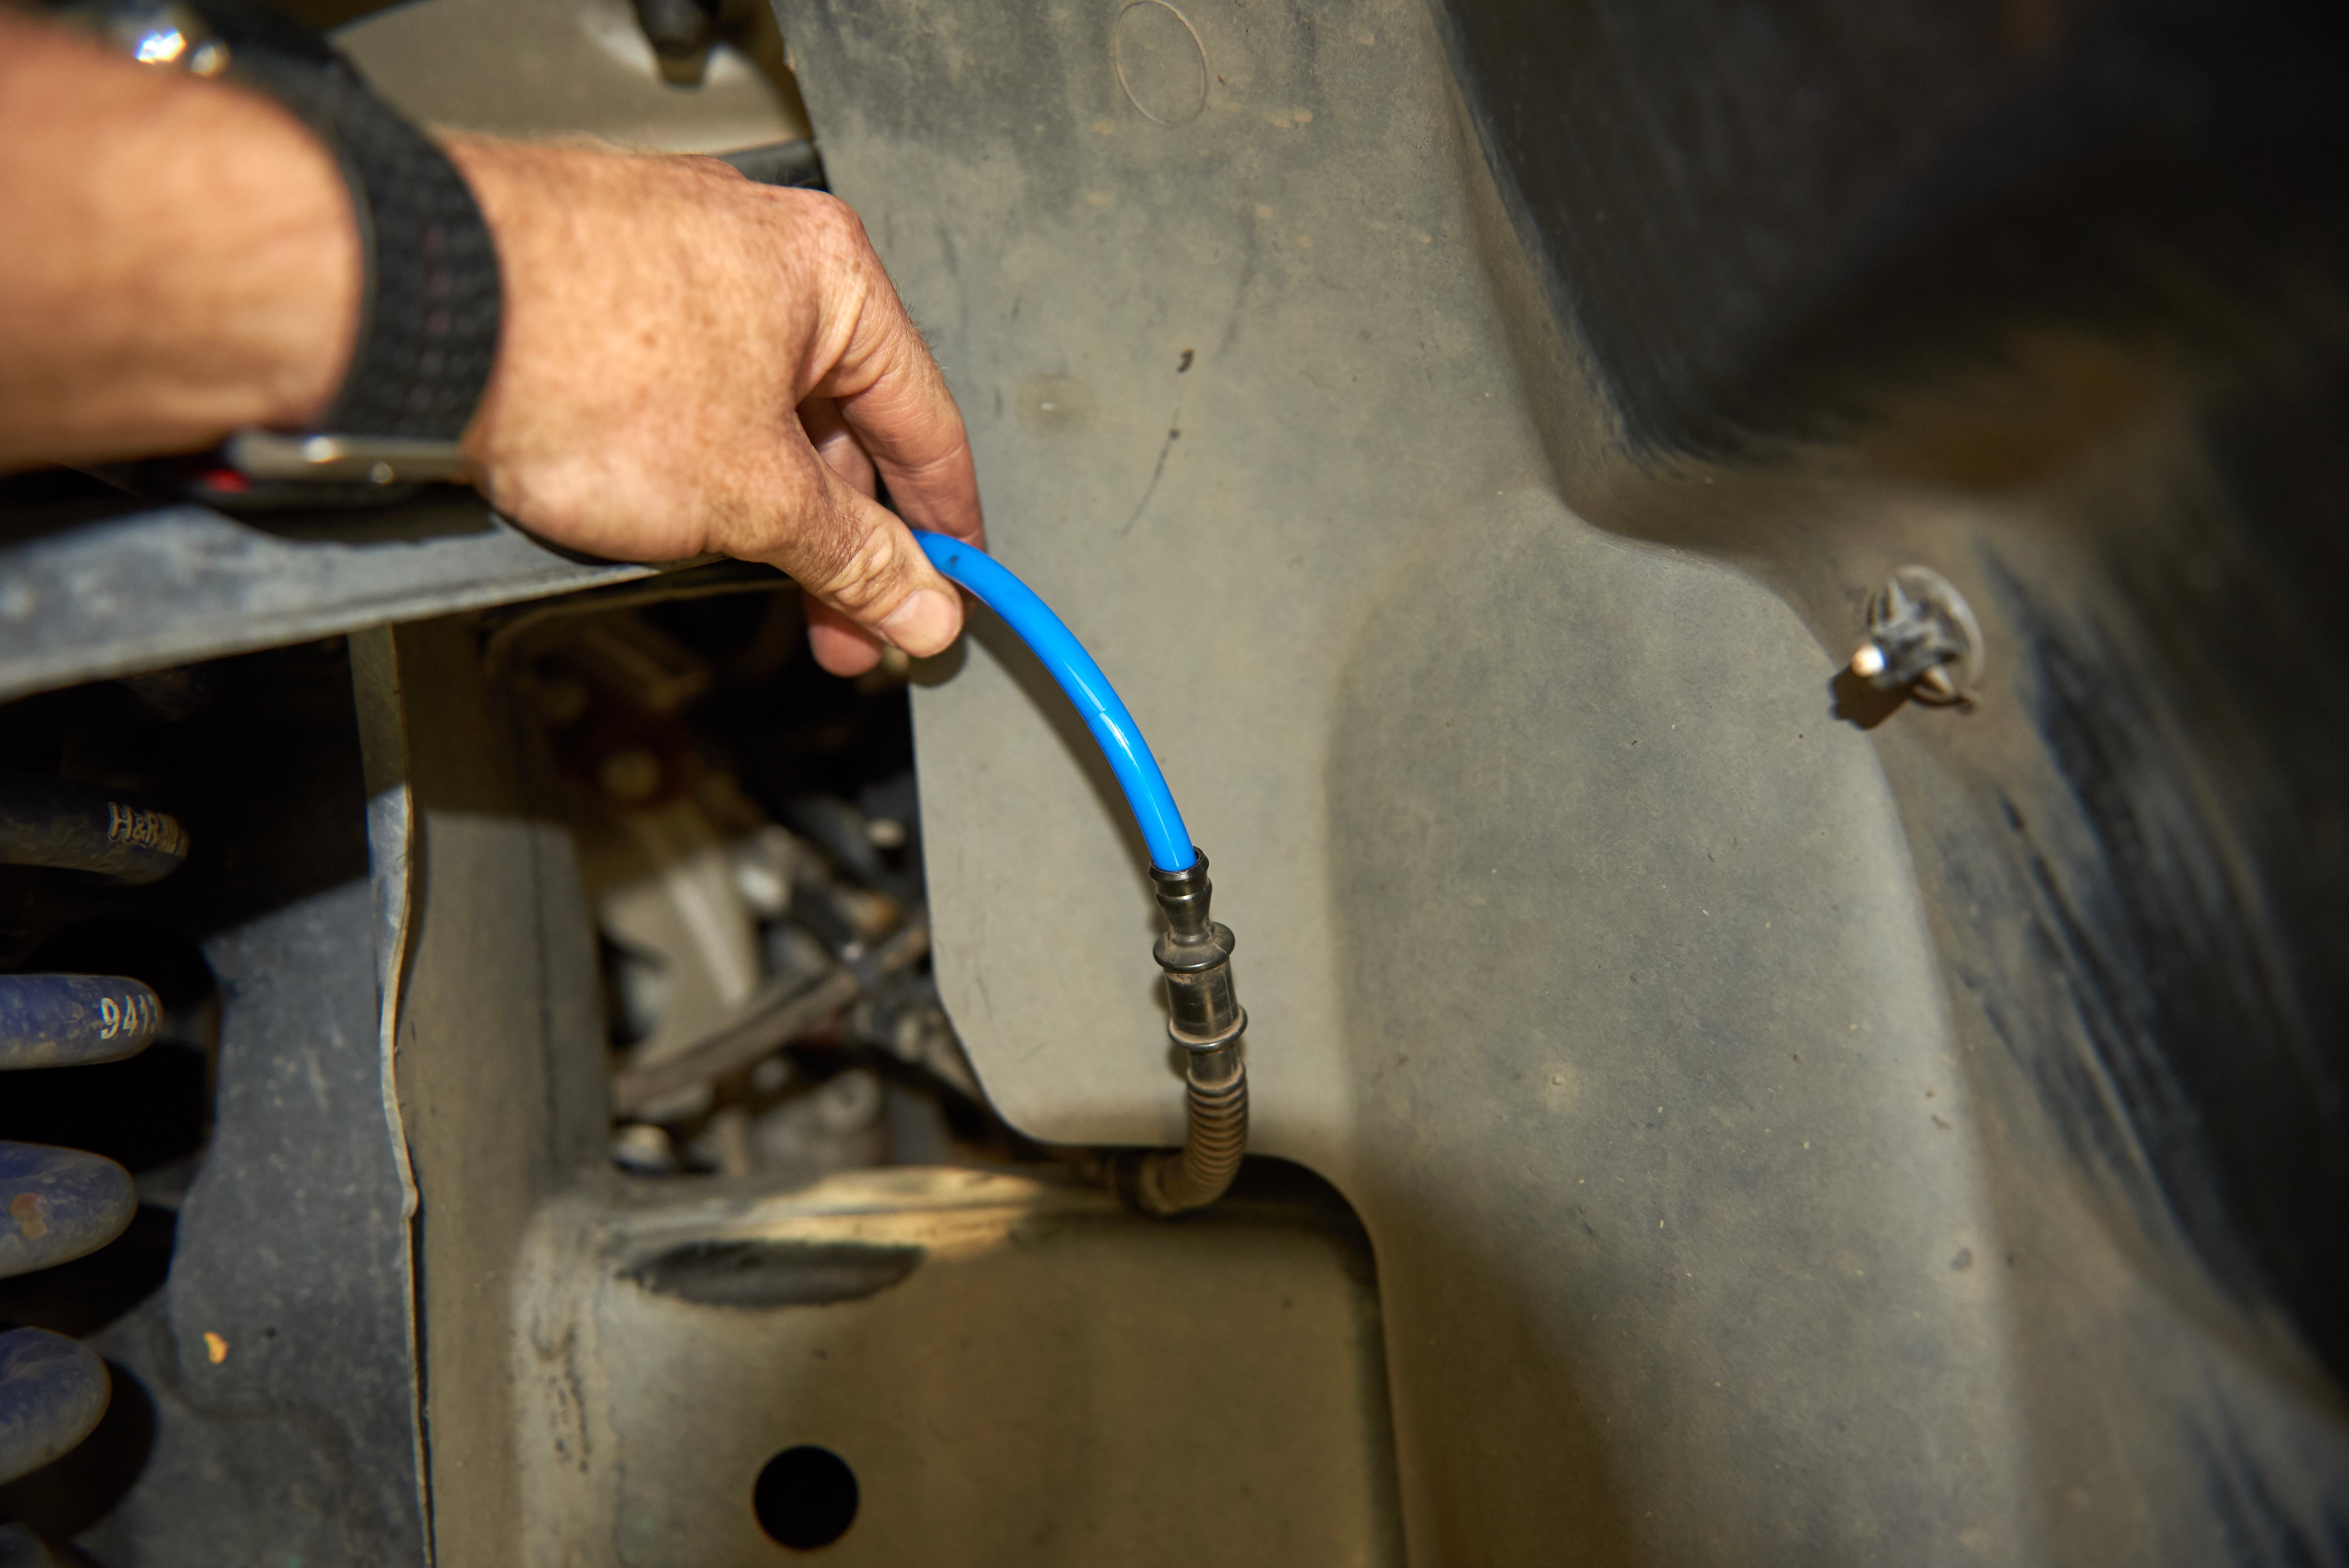
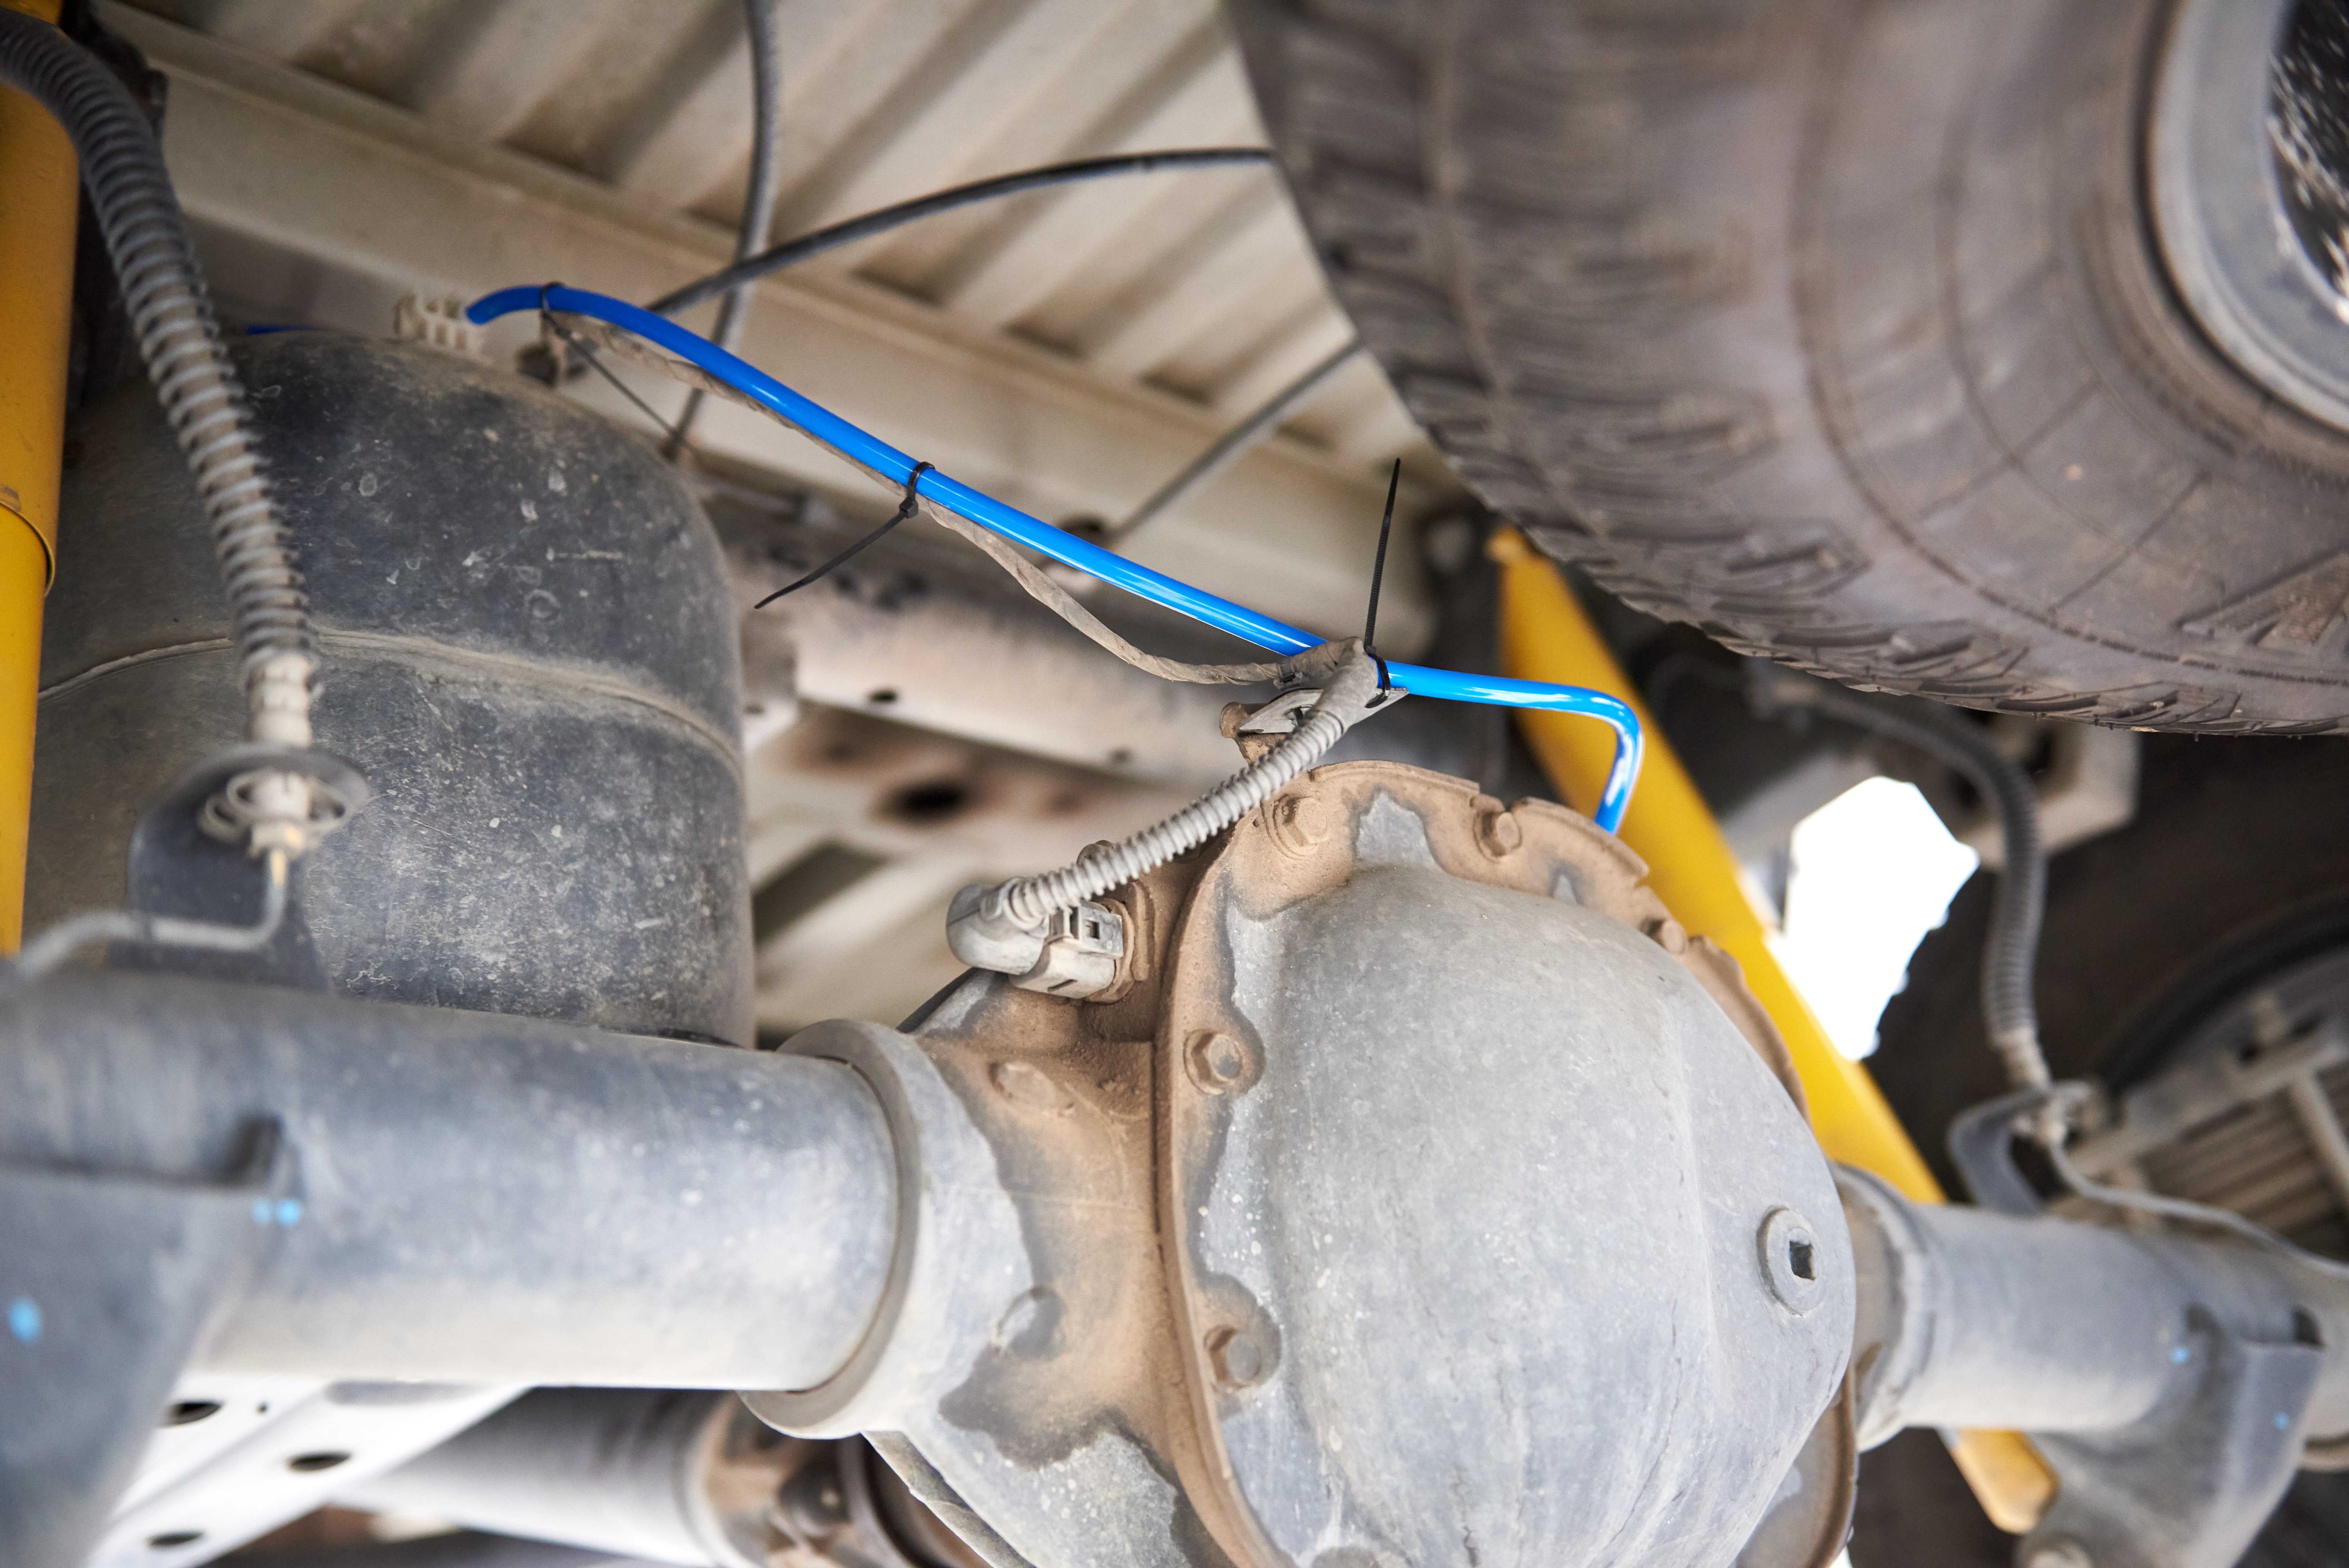
It was much easier to get photos of the rear diff. Simply because it’s way too tight up under the front pumpkin in an IFS four-wheel drive to get a camera in there. So, you’ll see in the photo the factory breather coming out the driver’s side of the diff pumpkin. On the Amarok it’s just a barbed push-type fitting. So all you need to do is pull the factory hose off and follow it back up into the guts of the tray to remove it from the vehicle.
Once you’ve removed the factory line, plug in the new extended hose. They will be the same diameter if you got a specific kit for your vehicle. Make sure you use the longer of the two hoses here for the rear diff. That or you’ll be running them twice. Ask me how I know… For the front diff and the transfer case this kit extends from the factory breather line. You simply remove the factory breather line and firmly insert the new blue breather line inside of the factory line. A bit of silicone will ensure a tight seal. Take your time, and make sure everything is properly connected.
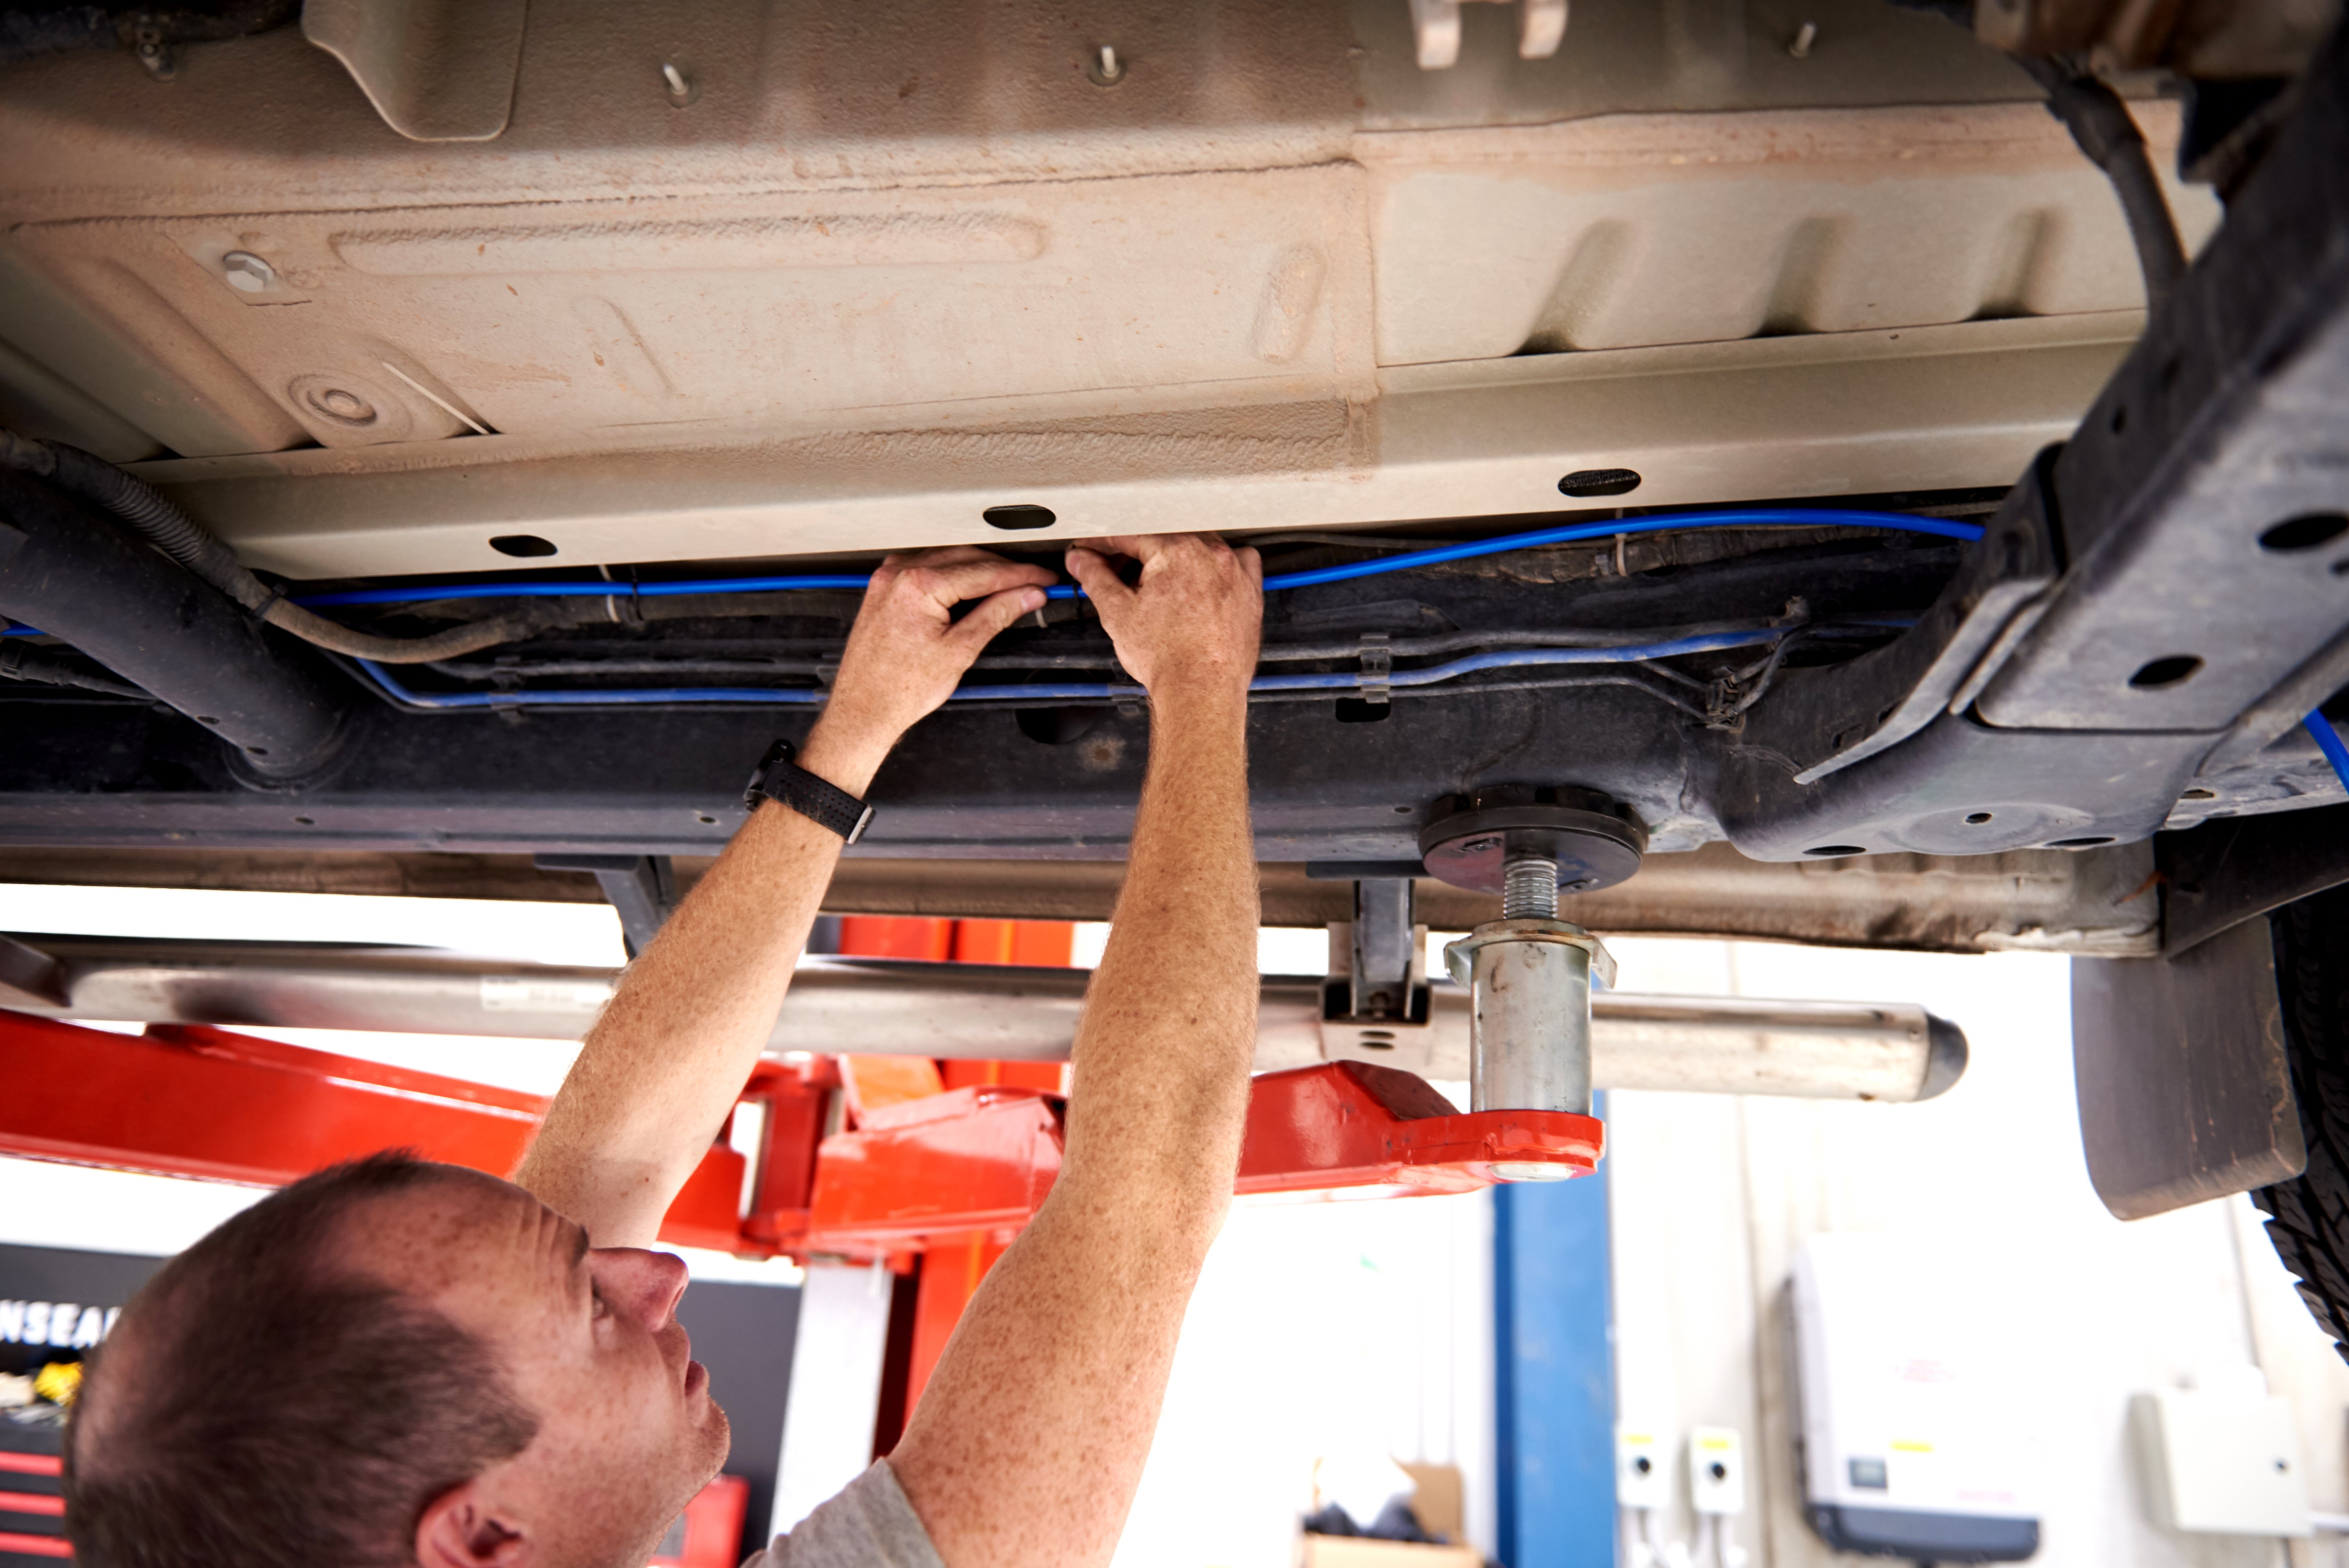
Now you’ll want to run the extended line up to your chassis. If there’s something connected to the diff, like wiring or an air-locker line, follow this. Just make sure you leave enough slack for the diff at full down travel. This is doubly important, as if you put your rig on a two-post hoist, the diff will drop away to full down travel. Make sure you’re not going to run out of hose length. If you shorten it up too much, you’ll be testing the tensile strength of that hose,. Believe me, it’s not much. You’ll note in the next photo, we have done the install on a two-post hoist, so the diff is as low as it’s ever going to get with that suspension in it.
Once you’ve routed the line up to the chassis, chances are you’ll find a brake line, wire harness, or fuel line you can mount the breather hose to. Don’t be too concerned here. The breather line is not under pressure, so just about anything up and out of the way will do. Just make sure you don’t tighten the zip-ties down too hard, as you can crush the breather line, which defeats the whole purpose, and will pressurise your diff.
Once you’ve reached the firewall, you want to run your lines up to the top, finding places you can secure the lines. Just about anywhere will do but keeping things neat is the name of the game here. If you want to get really carried away, a bit of automotive flexible conduit keeps things tidy. Worth noting, is making sure you keep everything away from anything hot – exhausts, turbos, dump pipes. Plastic and 500°C don’t mix.
Once you have run the lines up to a high spot on the firewall (the Amarok kit told us exactly where to mount it), find a place to secure the breather head. Screw in the push-pull fittings and insert the lines. If ever you need to remove the lines, all you have to do is push the blue ring on the fitting in, then pull the line – it should come straight out. And there you have it; a set of diff breathers up nice and high, hopefully out of water’s reach.
Just as a quick afterthought, driving through cold water after you’ve been in the saddle for hours on end will shorten the lifespan of your brakes and wheel bearings, so if you can manage to wait a little while for things to cool a bit before drowning your running gear, your four-wheel drive and back pocket will thank you for it. We’ll have a complete guide to water crossings online in the next couple of weeks along with a video too.