Split a boot, heard a click followed by a loud bang from your 4×4? It’s time to change your CV joints. Here’s everything you need to know about changing an IFS CV joint.
Having installed a catch can onto my HiLux, I spotted an oil leak in the inner wheel arch. Immediately, I thought I’d done something wrong during the install. However, it turned out to be a split CV boot that had shot grease everywhere. By the time I noticed the mess, it was too late as mud and grit had made its way into the CV joint, and it started clicking like an arthritic wrist, when in four-wheel drive. Needing to be replaced, rather than repaired it was the perfect opportunity, being armpit deep in CV grease to explain how to change a CV joint on an IFS 4WD and, in particular, a 2005+ Toyota HiLux.
TOOLS AND PARTS REQUIRED:
A CV joint install is going to vary from vehicle to vehicle, but this is what I needed to get the job done. Also, power tools aren’t required, but if you have them, use them.
- A jack and rated axle stands (we’re lucky and have a hoist);
- Torque wrench;
- Sockets (a 10mm, 19mm, 21mm and 35mm is required for this vehicle);
- Pry bar or large flat head screwdrivers;
- Hammer;
- Small flathead screw driver; and
- 17mm spanner and a 6mm Allen key (to remove the swaybar).

TO REPAIR OR REPLACE?
If the boot is just slightly damaged, and the CV joint is still in good condition, you can have the boots replaced reasonably inexpensively. However, it means your vehicle will be undrivable until they are repaired. I couldn’t take that amount of downtime, so I decided to replace both CV joints, and keep the old ones as spares with new boots and fresh grease. Considering my Lux doesn’t have free-wheeling hubs, the CVs are constantly spinning, so will wear out faster than a vehicle with free-wheeling hubs. As such, it is the right thing to do, considering there is damn near 300,000km on these CV joints.

GENUINE OR AFTERMARKET?
You know that old saying: if it sounds too good to be true, it probably isn’t? Well, while shopping around for replacement CV joints, I found I could get them for $159.95 a pair. What a bargain, that’s cheaper than just replacing the boots, but are they too cheap? Next up, I checked to see how much a genuine Toyota CV joint costs, and I wasn’t surprised to find out each CV joint, was going to set me back $550. So, for a set, you’re looking at $1100; that’s nearly enough to buy a diff lock, so, those initial $160 jobbies looked way too cheap.
I decided to call around reputable 4WD parts suppliers to see if I could find a balance between price and performance and in the end decided on Terrain Tamer replacements for a few reasons. They have stockists Australia wide, in the event something does go wrong. They have a reputation for supplying quality parts, I’ve had no issues with their gear in the past, and lastly, they were a fair bit cheaper than genuine.
HOW TO CHANGE AN IFS CV JOINT
This is something every four-wheel driver should know how to do or at least have a mate that does. It’s not a hard job, especially in the case of a HiLux. This is my first IFS vehicle, yes I’m one of those old-school solid-axle fans, but I think it’s even easier to swap an IFS CV than a solid axle one.
*Disclaimer – this is general information only. I am not a mechanic, take this advice as a guide only and please be safe. If you are unsure, consult a licensed mechanic before doing anything*
- Jack up the vehicle and make sure it is secure on rated stands or a hoist;
- Remove the wheel and pop off the dust cover with a screwdriver and hammer or similar;
- Use that screwdriver to flatten and remove the cotter pin (split pin) in the end of the CV joint and use a 35mm socket to remove the driveshaft nut. I used an impact gun, otherwise put the wheel back on and lower it so it can’t spin and use a breaker bar to remove this nut – it’s tight and needs to be retightened to 265nm when putting it back together;
- Remove the swaybar link using a 17mm spanner and a 6mm Allen key;
- Remove the steering arm cotter pin and nut. Grab a long bar and leverage the arm down, then hit the part where it connects (not the arm) and the tapered fitting should drop out;
- Remove the two lower balljoint hub bolts, a 19mm socket and an impact gun makes short work of this;
- Give the hub end a tap with a piece of wood or something soft, to get the driveshaft to go through the hub;
- Lever the whole hub up and out of the way, I secured it with a few cable ties, so the brake lines don’t get damaged;
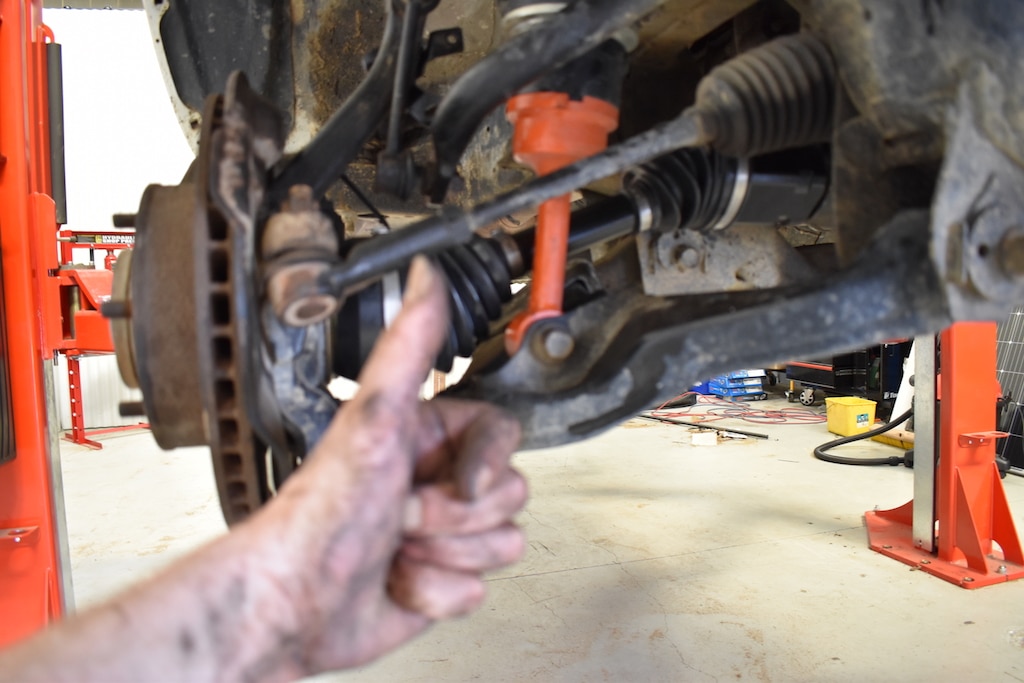
- Now for the hardest part of the job, getting the CV out of the diff end. I found a long handles crowbar and a hammer worked the best. Get the crowbar wedged between the diff and CV and try to work it free; and
- Installation is the reverse process, and it should take you under an hour each side once you have done it a few times.
Check out this video to see just what goes into swapping out an old CV joint, and installing a new one:

Disclaimer: The information contained in this magazine(s) and website(s) is for general purposes only. However, neither Pat Callinan Media Pty Ltd nor its editors or authors guarantees the accuracy or completeness of any information published, and neither Pat Callinan Media Pty Ltd nor its editors or authors shall be responsible for any errors, omissions, or claims for damages, including exemplary damages, arising out of use, inability to use, or with regard to the accuracy or sufficiency of the information contained in Pat Callinan Media Pty Ltd publications.