Servicing your winch is essential to keeping it reliable when you need it most. Your winch contains vital parts like seals, bearings, gearsets, and about four tubs worth of grease that wears out over time. In this guide, we’ll cover the key components and how to keep them in top shape.
Servicing your winch is essential to keeping it reliable when you need it most. Your winch contains vital parts like seals, bearings, gearsets, and about four tubs worth of grease that wears out over time. In this guide, we’ll cover the key components and how to keep them in top shape.
For most of us, you’ll want to aim at servicing your winch every 12 months, giving it a birthday as it were, or if you use it every other weekend, every six months might be a better idea.
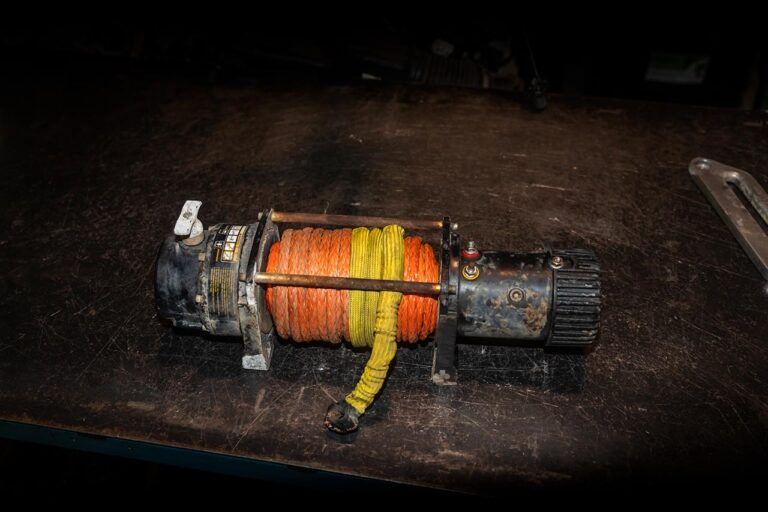
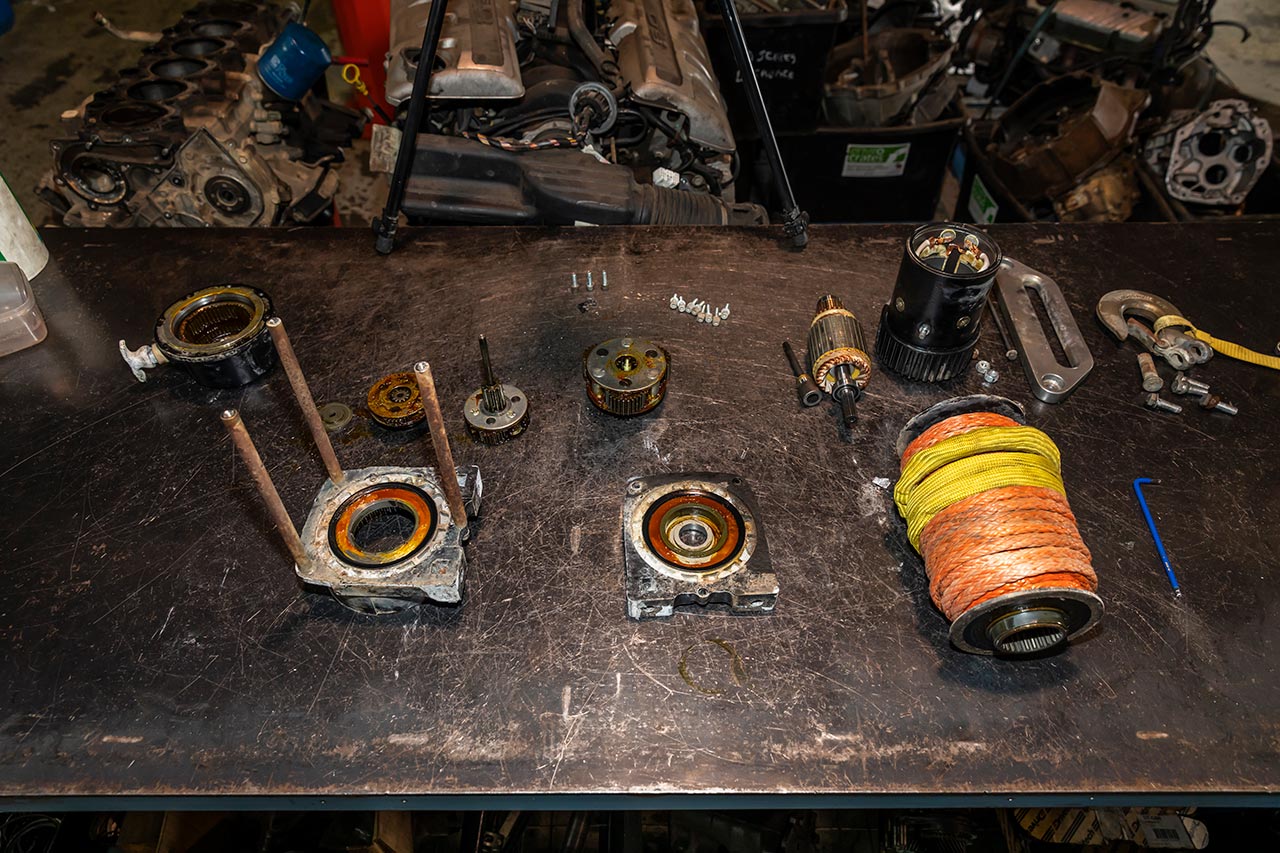
Servicing your winch starts with tearing it to pieces
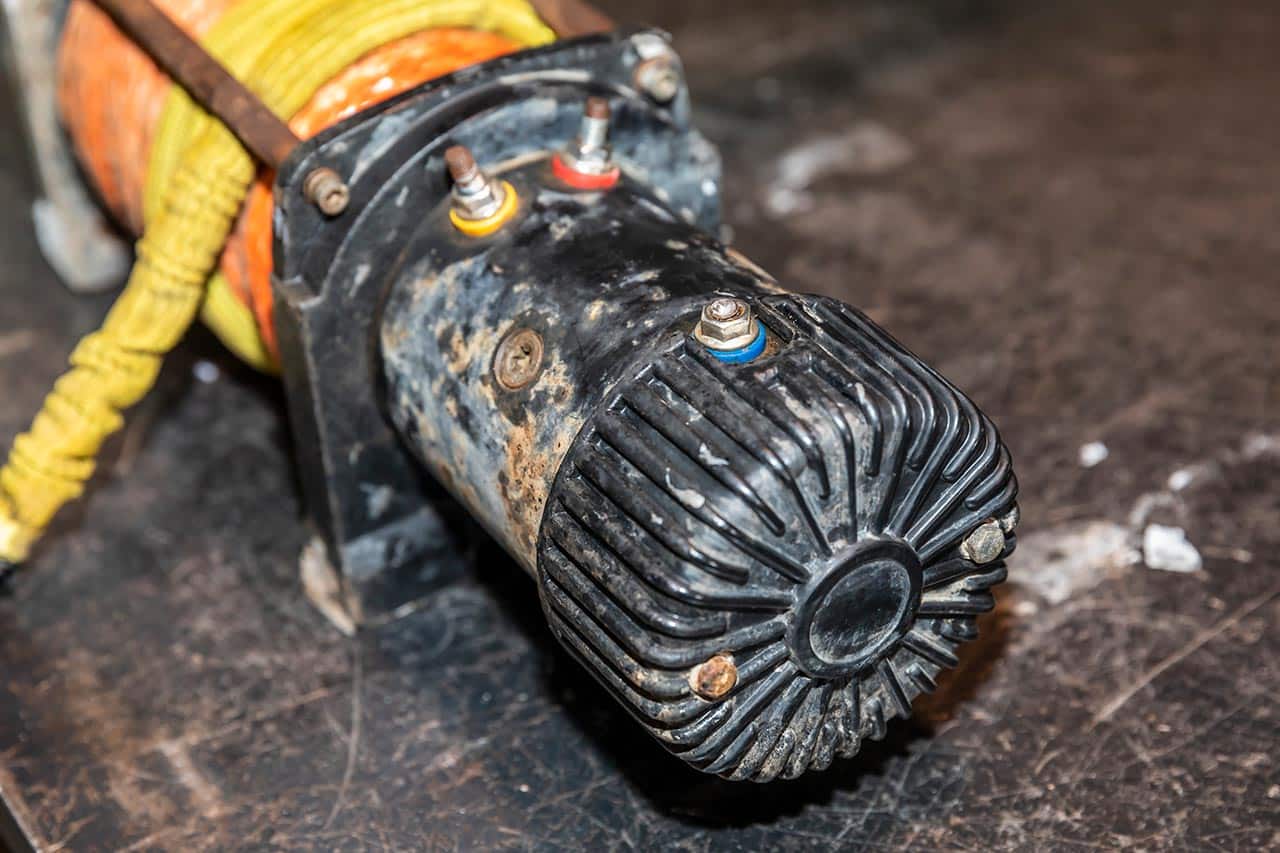
Despite drowning it in anti-seize, this contact point just sheared off when undoing the top nut
The fun part of servicing your winch is stripping it. They are very simple beasts, so tearing it down shouldn’t be an issue. All I needed was a 10mm spanner and a 5mm Allen key. That said, being able to put all the pieces of the puzzle back together, in the right order and the right way around, is paramount to having a working winch at the end of it. A bench where you can lay the pieces out, in order, and in the correct orientation, is the simplest way to do it.
What to check and replace when servicing your winch
Now that you’ve got your winch pulled apart, and it resembles a greasy jigsaw puzzle, here are the things you’ll need to be checking as you go.
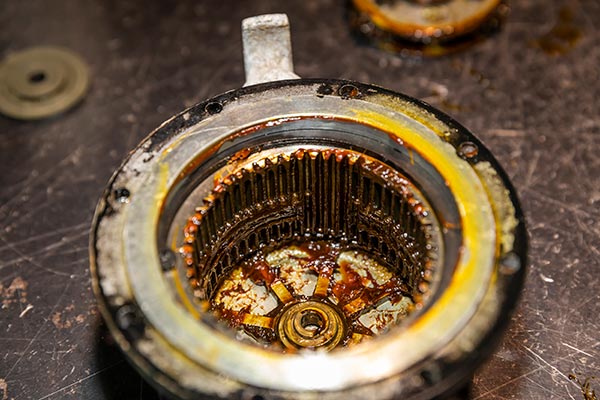
#1. Corrosion
The biggest killer of winches is corrosion. Whether you’ve had water ingress into the motor or the gearbox, anything corroded or rusted is going to give you trouble. Also, if you get water into the grease, the factory grease will breakdown and wreck your whole day.
When servicing your winch, you want to be checking the bearings, gearsets, motor, brushes, contact plates and magnets within your motor for corrosion. Should you find any, clean it up as best you can, either with a bit of emery cloth, or electrical contact cleaner at the motor end.
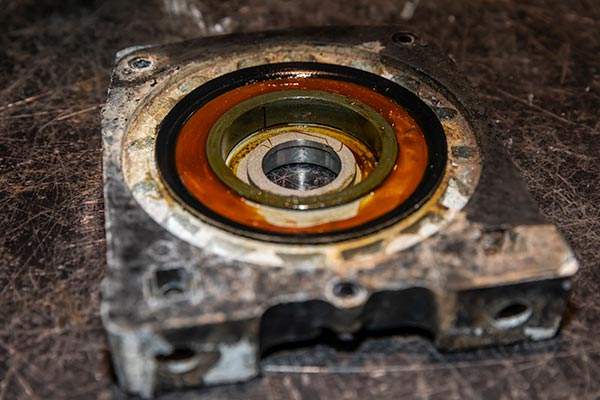
#2. Bearings
The two main bearings you’ll find inside your winch when servicing it are on the armature of the electric motor. The ones on mine were in good nick. However, should yours be buggered, most bearing mobs will carry them. You should find the bearing number on the inner race – mine were 6202RS, which are fairly common. Failing finding a part number, pull them off and the bearing company should be able to match them to height, inner diameter, and outer diameter.
#3. Bushes
Aside from bearings, you’ll have bushes throughout the winch that let things spin freely. These sit on the ends of the drum and within your gearbox. Some of them look like big plastic washers. Make sure you inspect these when servicing your winch, ensuring they’re in good nick, without major wear or any cracks or chips. Should you have one go belly up, depending on your winch manufacturer, you may be able to buy replacements, however on the winch I’ve stripped, I don’t like my chances.
#4. Seals
Such a simple bit of rubber can be the difference between your winch lasting 12 months, and 10 years. Any housings of your winch that open to the outside world should have a rubber seal or gasket between the housings. These keep the water out, and grease in. Make sure you give all of the seals you find a good check-over when servicing your winch. Check for pinching, deterioration, or cracking, as without them you’re gonna have a bad time.
Should you find a seal that’s perished and you’re unable to get a hold of replacements from the manufacturer, a bit of high-temp RTV silicone sealant will do the trick. Just make sure you use enough in place of the gasket, but not so much that it’s going to squeeze into the components of the diff when you close the housing back up. You’ll also need to ensure the mating surfaces are perfectly clean and dry before trying to seal them. Some brake cleaner spray and a clean rag work wonders for this.
#5. Grease
If you’ve had a seal die, or otherwise gotten moisture into your winch, chances are the factory grease has sucked it up and more resembles milky goop than tacky grease. This is where the job of servicing your winch suddenly becomes hours of fun (read: not fun at all) and you’ll want to sit the kids down with a tub full of degreaser and a toothbrush. Is there really any other reason to have kids?
Once you’ve gotten the shot grease out of the gearsets with degreaser, make sure you spray them down with brake cleaner to remove any degreaser residue and repack with grease. As to which grease, a high-temp marine grease is a solid go-to, as it won’t suck up water, and is designed to live life in salty, sandy, and wet environments. Alternatively, Castrol Spheerol LMM Lithium grease is a good option should you have some laying around the shed.
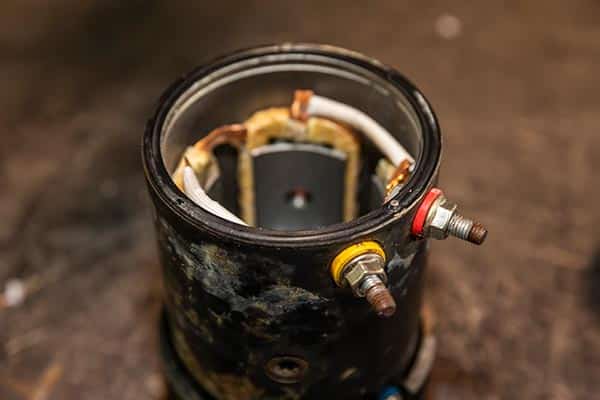
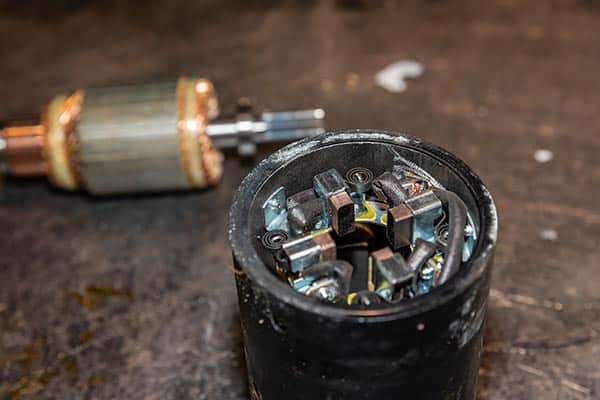
#6. Brushes and commutator
For the electric motor end, aside from the bearings, the only real components to think about when DIY servicing your winch are the commutator and brushes. The brushes are spring-tensioned lumps of carbon that run on the commutator as the motor spins. As they’re in contact with the commutator, they wear. It will take a lot of use to rub through the brushes. However, if you wear them out, they can be purchased from industrial electrical companies like Ashdown-Ingram for a few dollars a set.
So you want to check to make sure they’ve still got plenty of meat on them and the springs aren’t broken or at full extension. The commutator will also wear, but not nearly as quickly as the carbon brushes, so if it’s looking black as opposed to shiny copper, a gentle touch-up with some fine grit emery cloth will ensure it’s contacting the brushes efficiently.
#7. The rope
I check over mine every month, so I’ve not done it in this guide to servicing your winch, but make sure you check over your rope. When you’re running the winch out once a month, have a good look at the rope; make sure it’s not perished, frayed or has cuts or abrasions, as these will all be weak points. If you discover anything like this, then it’s a good idea to buy a new rope/cable. If it’s been dragged through the mud, clean it out in a bucket of mild soapy water, as the mud will lead to an early death of your rope.
When you’re re-spooling, make sure you get the first few wraps lined up as perfectly as you can, on either a slight incline or level ground and with the handbrake on a few clicks. It’s even worth doing this if you’ve had a new winch fitted as few winches are ever pre-tensioned before fitment.
Quick DIY servicing your winch tip: Before reassembling, make sure the drain plug is free of any blockages. Many people tap a thread into the plug-hole and run a breather tube up into the engine bay to prevent water and mud ingress – a good idea if you regularly drive in such conditions.
What’s the prognosis on my winch, Doc?
Laid out on the operating table, things are not looking good for this winch … seems it’s got cancer in the housings.
After tearing down my winch for a servicing and giving it a good look-over, the internals were all in good nick. That said, it’s sat on the front of my ‘Cruiser for three years, and only been used in anger a handful of times, besides being rolled in and out every month to ensure it’s still working.
It is the second winch I’ve had of this brand after the first one’s seals all let go, and corrosion ate up the motor and gearbox. The first was replaced under warranty, after a six-month argument no less.
Where my winch has fallen over, is that the housings have completely died. With the alloy used in the housing construction being of such low quality, I’ve got cracks around the mounting points through the alloy, and despite drowning the electrical contact points in Rost Off, one of the bolts sheered as I was undoing the cables. You’ll see in the photos here the way in which the free-spool handle has perished, along with the outer housings.
The greatest tragedy is the quality of material used for the winch. The design is pretty solid, despite the fact winches are fairly basic with how they work. If the manufacturer had decided to use better materials and painting procedures, I’d still be using this winch now. With the way the mounting points have cracked and perished, the winch won’t be going back onto my ‘Cruiser, as having them let go on a pull that’s not directly to the front, is not worth the risk.
I think I’ll shop around a bit for a new winch – won’t be going down the same path again.