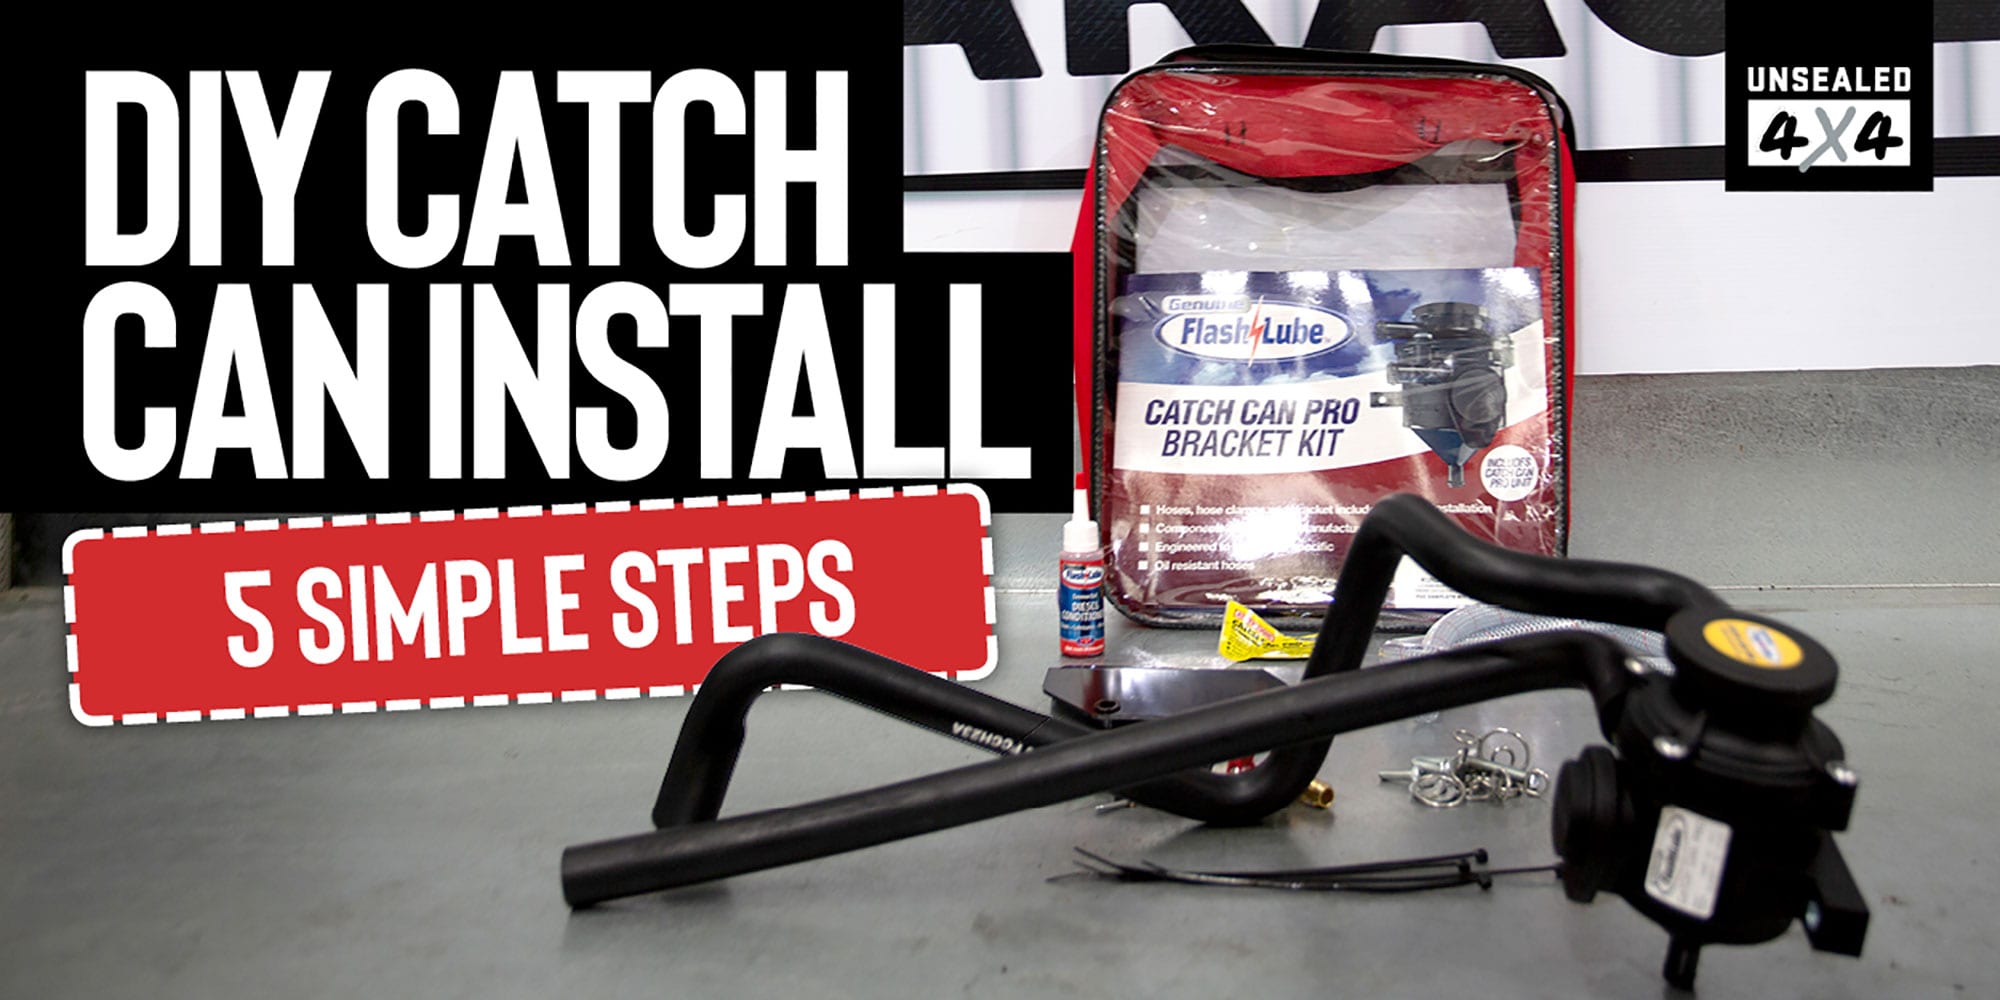
The easiest modification I’ve ever made to my HiLux was fitting a catch can. It was so easy I did it in my lunch break. here’s how you can fit a catch can in five simple steps.
By now we all know the importance of having a catch can; we’ve run several stories on them lately, including a comparison of which catch cans are the most effective at removing oil mist from your vehicle’s intake system. Which is why I’ve decided to install a catch can kit onto my own Toyota HiLux. So, here we go, in just five simple steps here’s how easy it can be to install a catch can at home.
CLICK HERE TO READ THIS ARTICLE IN OUR FREE DIGITAL MAGAZINE

1. CHOOSE YOUR KIT
I decided I didn’t want the hassle of making my own kit. For a few dollars more you can have mounting brackets, pre-formed hoses and all required fasteners supplied. I went with a Flashlube kit for all of these reasons. The Flashlube Catch Can Pro is one of the best on the market; the hoses are pre-formed to suit my vehicle, and it came with instructions (which I actually read) all packed neatly in a cool bag I can keep spares in.
Spare filters are easily available too, which is something I’ll need to keep an eye on once I get a few months use out of the catch can. There are other options, or you might want to piece together a kit yourself, however as I’m not paying for fitting, and hate those last-minute trips to the parts store, I stand by my decision to go with a kit.

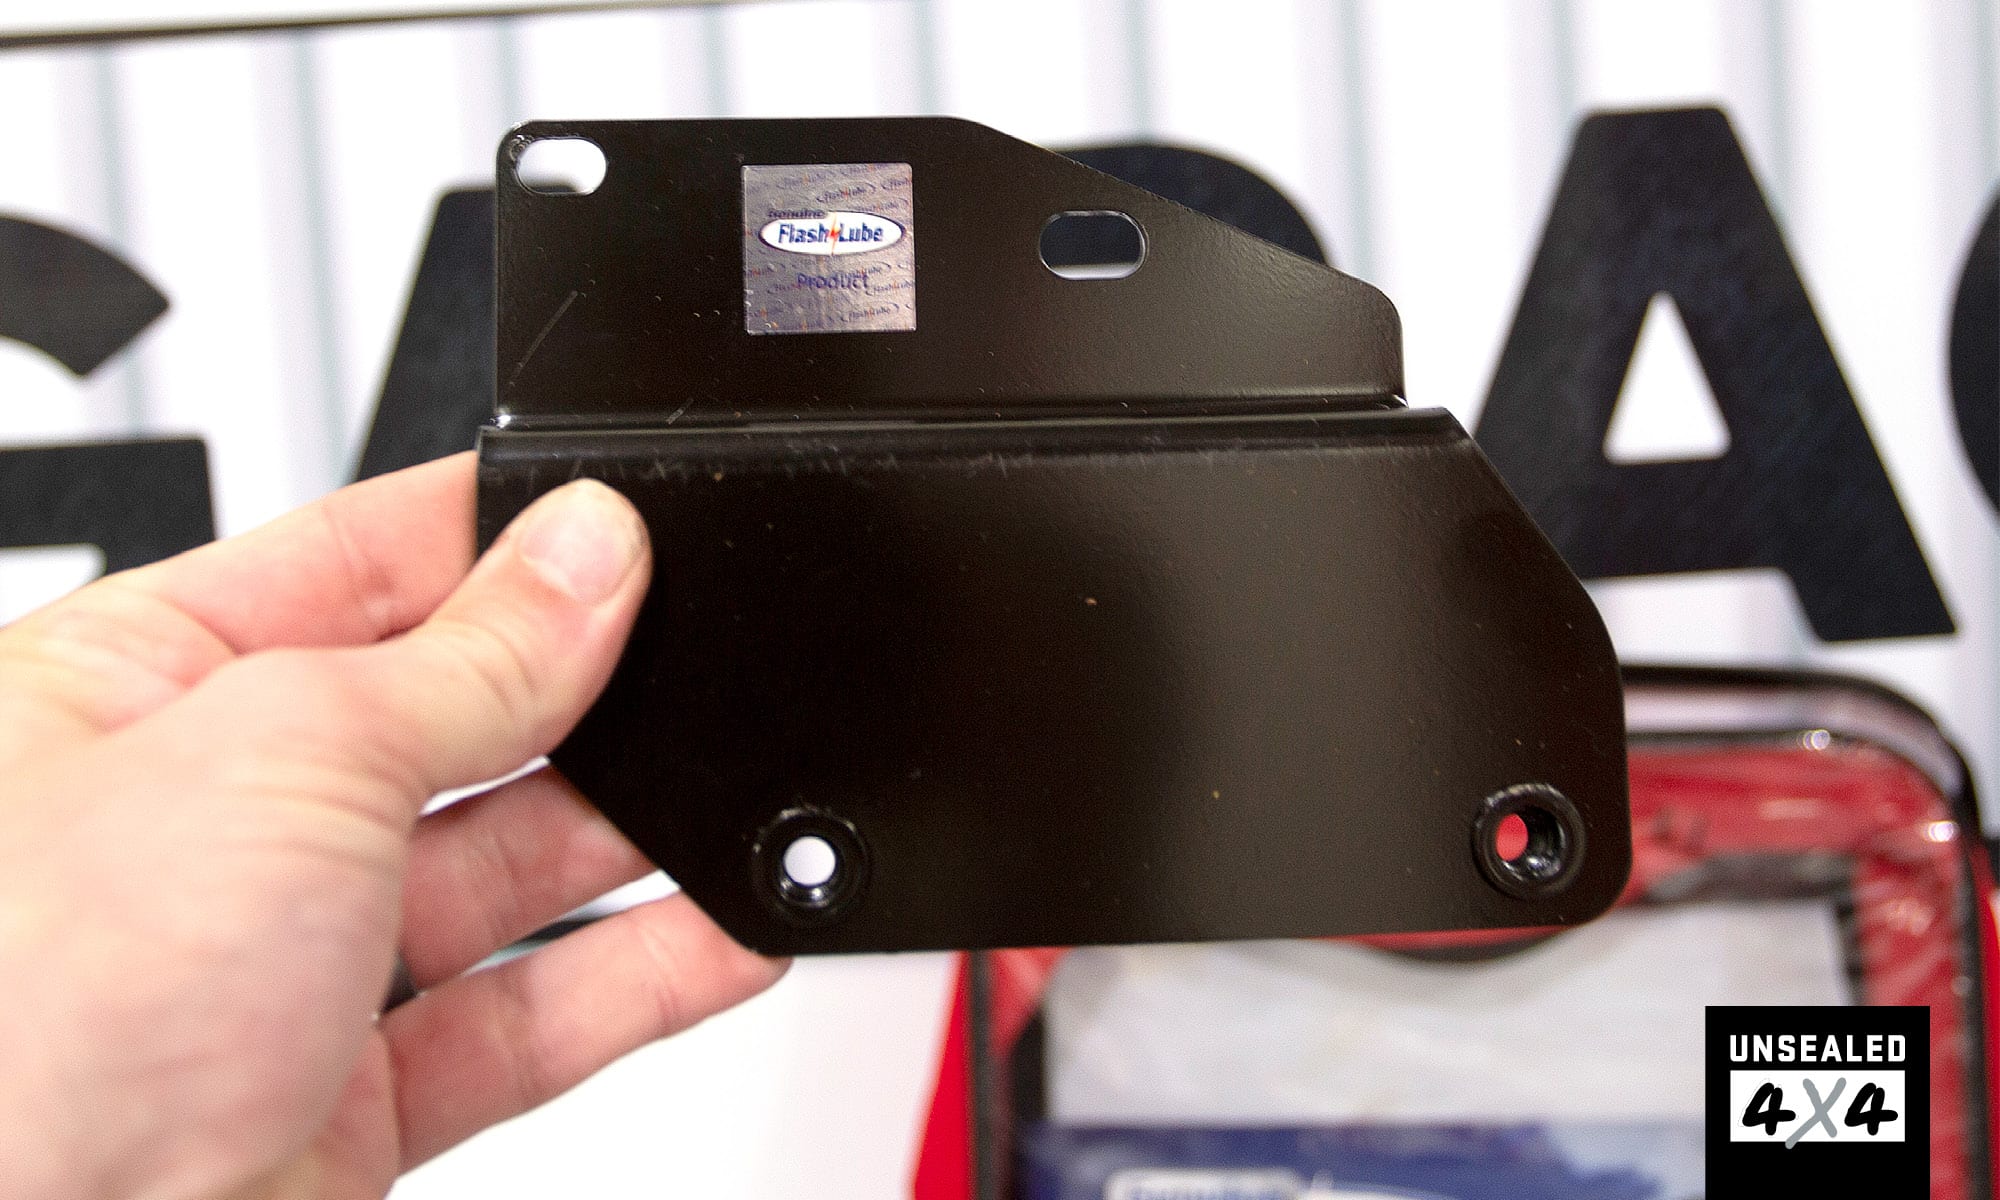
2. MOUNTING BRACKETS
In the case of my 2005 HiLux, the mounting bracket sits on the driver side inner guard with two captive nuts, meaning there’s no modifications required before installing the kit. I found it easier to install the drain tube onto the can first, and roughly route it before securing the catch can to the bracket. One mistake I made was bolting the bracket to the vehicle, then the catch can to the bracket. Next time, I’d bolt the can to the bracket and then the bracket to the body.
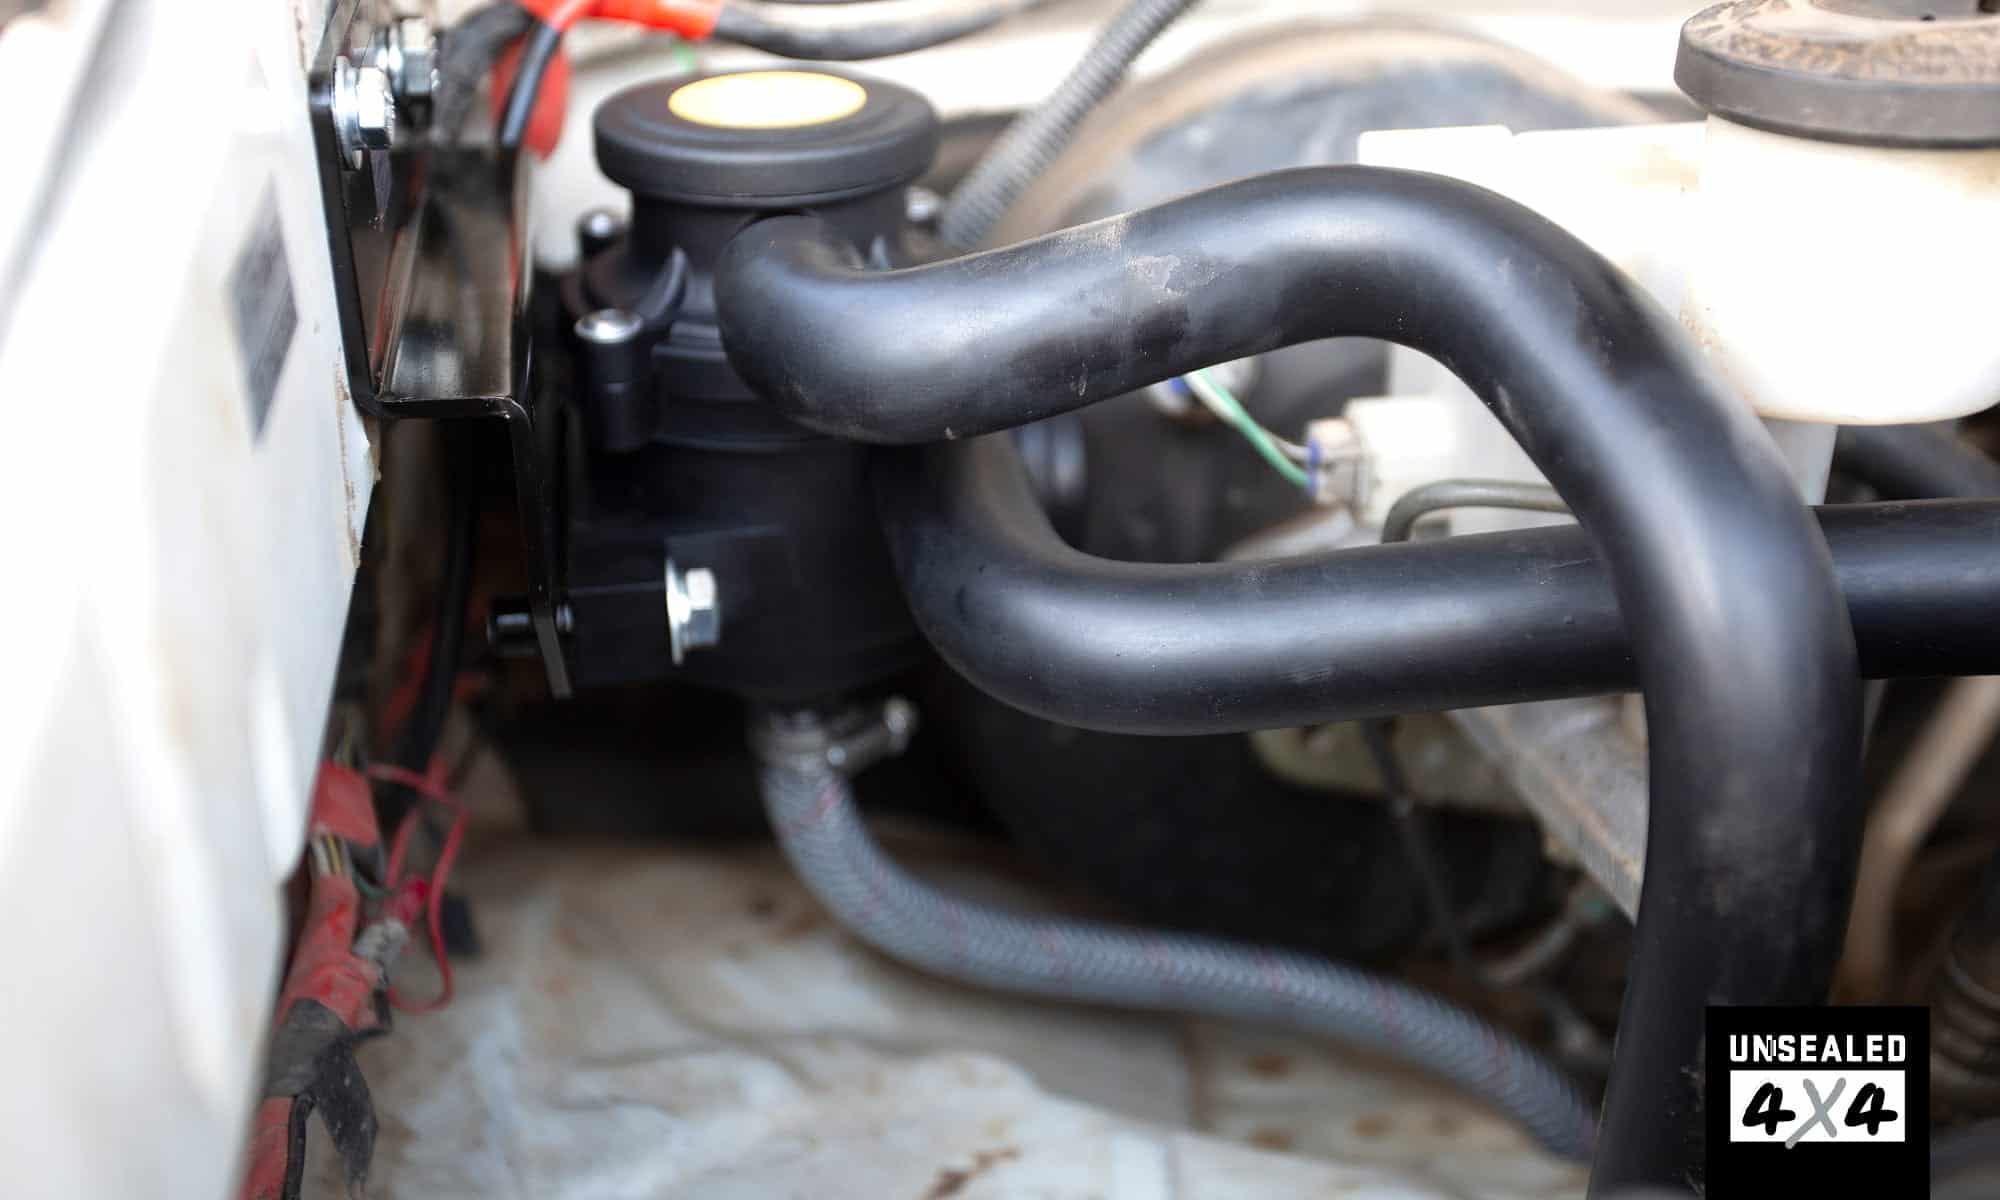
3. SECURE THE CAN
The easiest, and let’s be honest, most satisfying part of the install is securing the new catch can to the engine bay mounting bracket. It’s always refreshing to see something new and shiny in your engine bay, right? One trick here, is to not go too tight when bolting it down, as you might need to adjust the position of the catch can so inlet/outlet hoses land in the right spot. Once you are happy, it’s time to get serious and run the lines to the catch can. Don’t stress, it’s easier than you think.
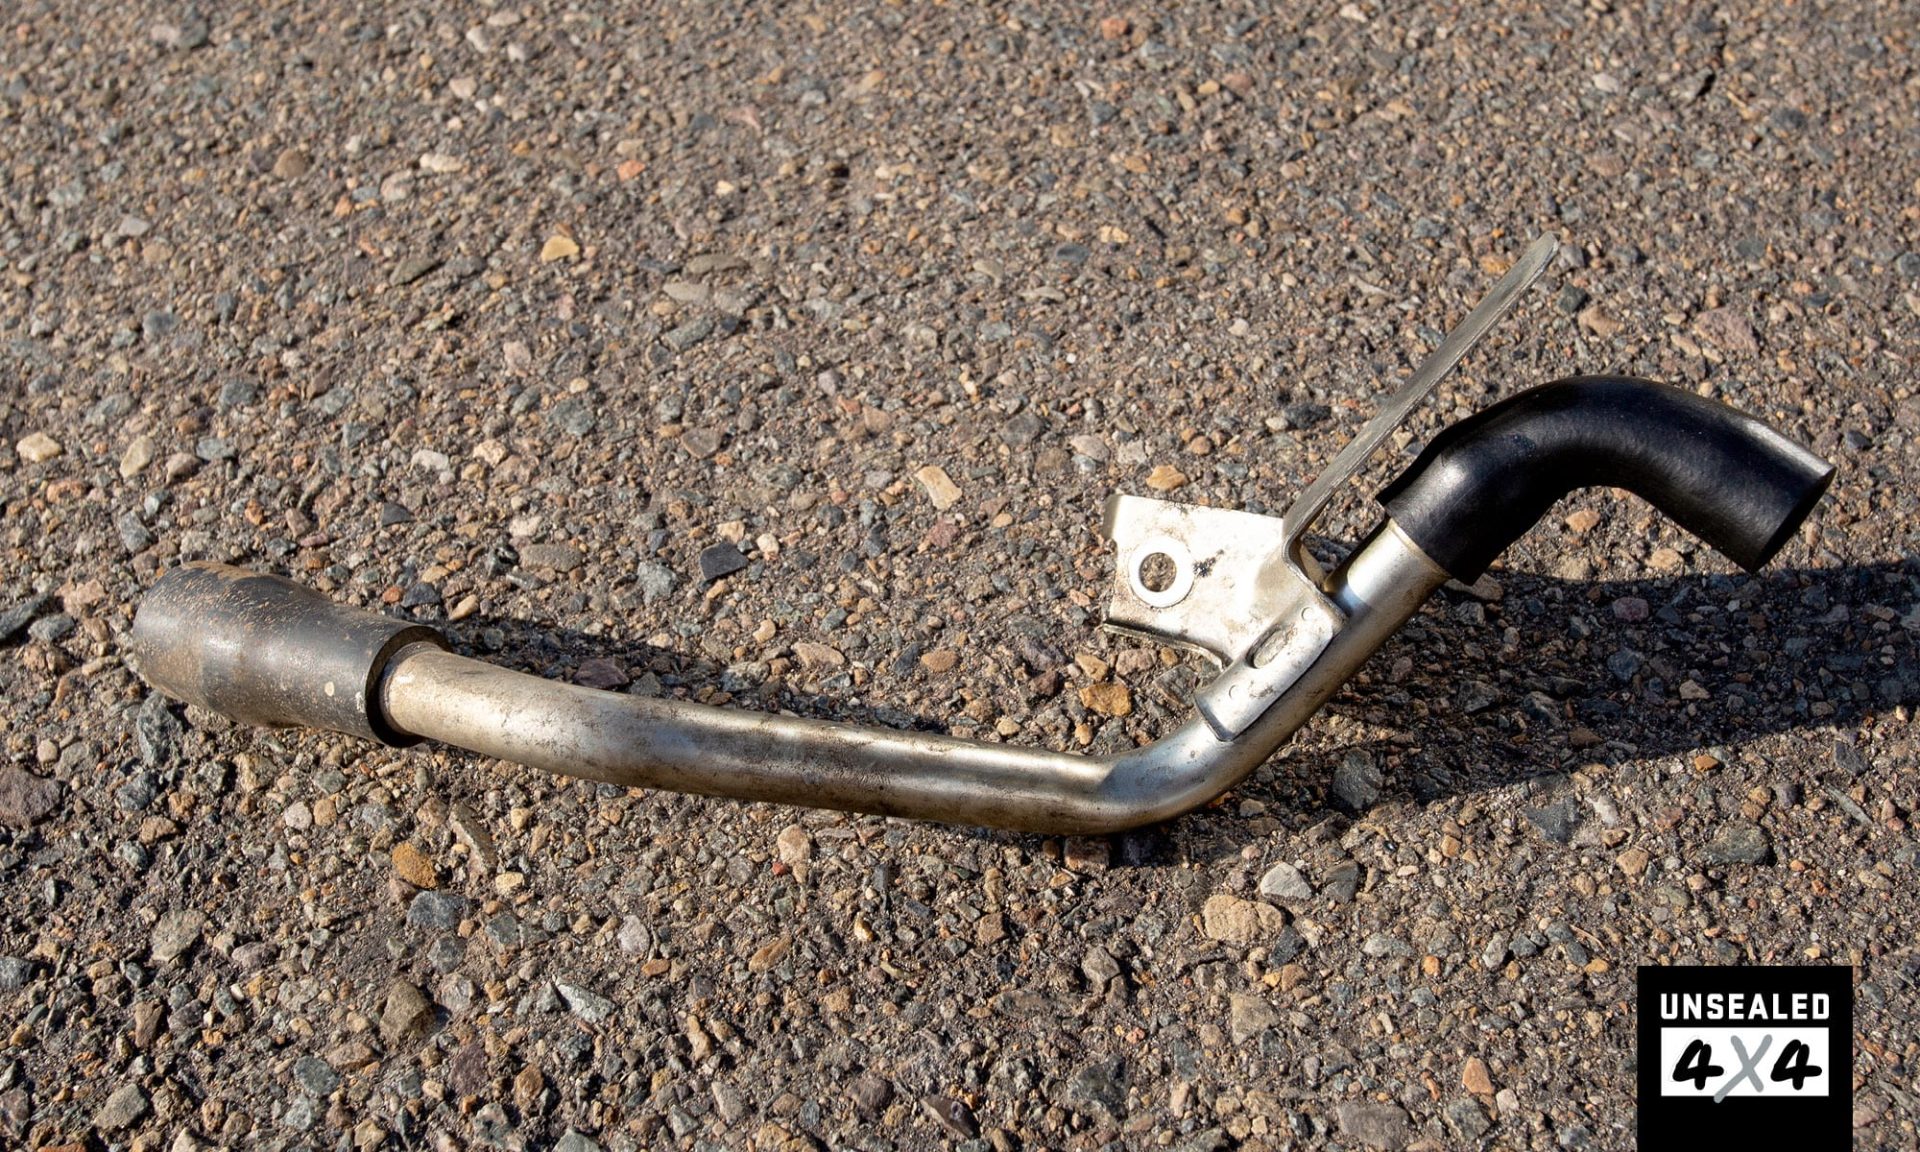
4. RUN THE LINES
This is probably the scariest part of the operation, but luckily all these modifications are reversible if you muck something up. Which you won’t, trust me. Have a plan as to where you want to run the lines, try to keep them away from any moving parts and heat sources, and you’ll be cheering. Fit the supplied hose clamps on first, and keep them loose. Then it’s just a case of running one to the inlet of the catch can and one to the outlet. In the case of my 2005 HiLux, I had to remove the intercooler cover (10mm nuts and bolts) and one 12mm bolt which held the factory line to the block.
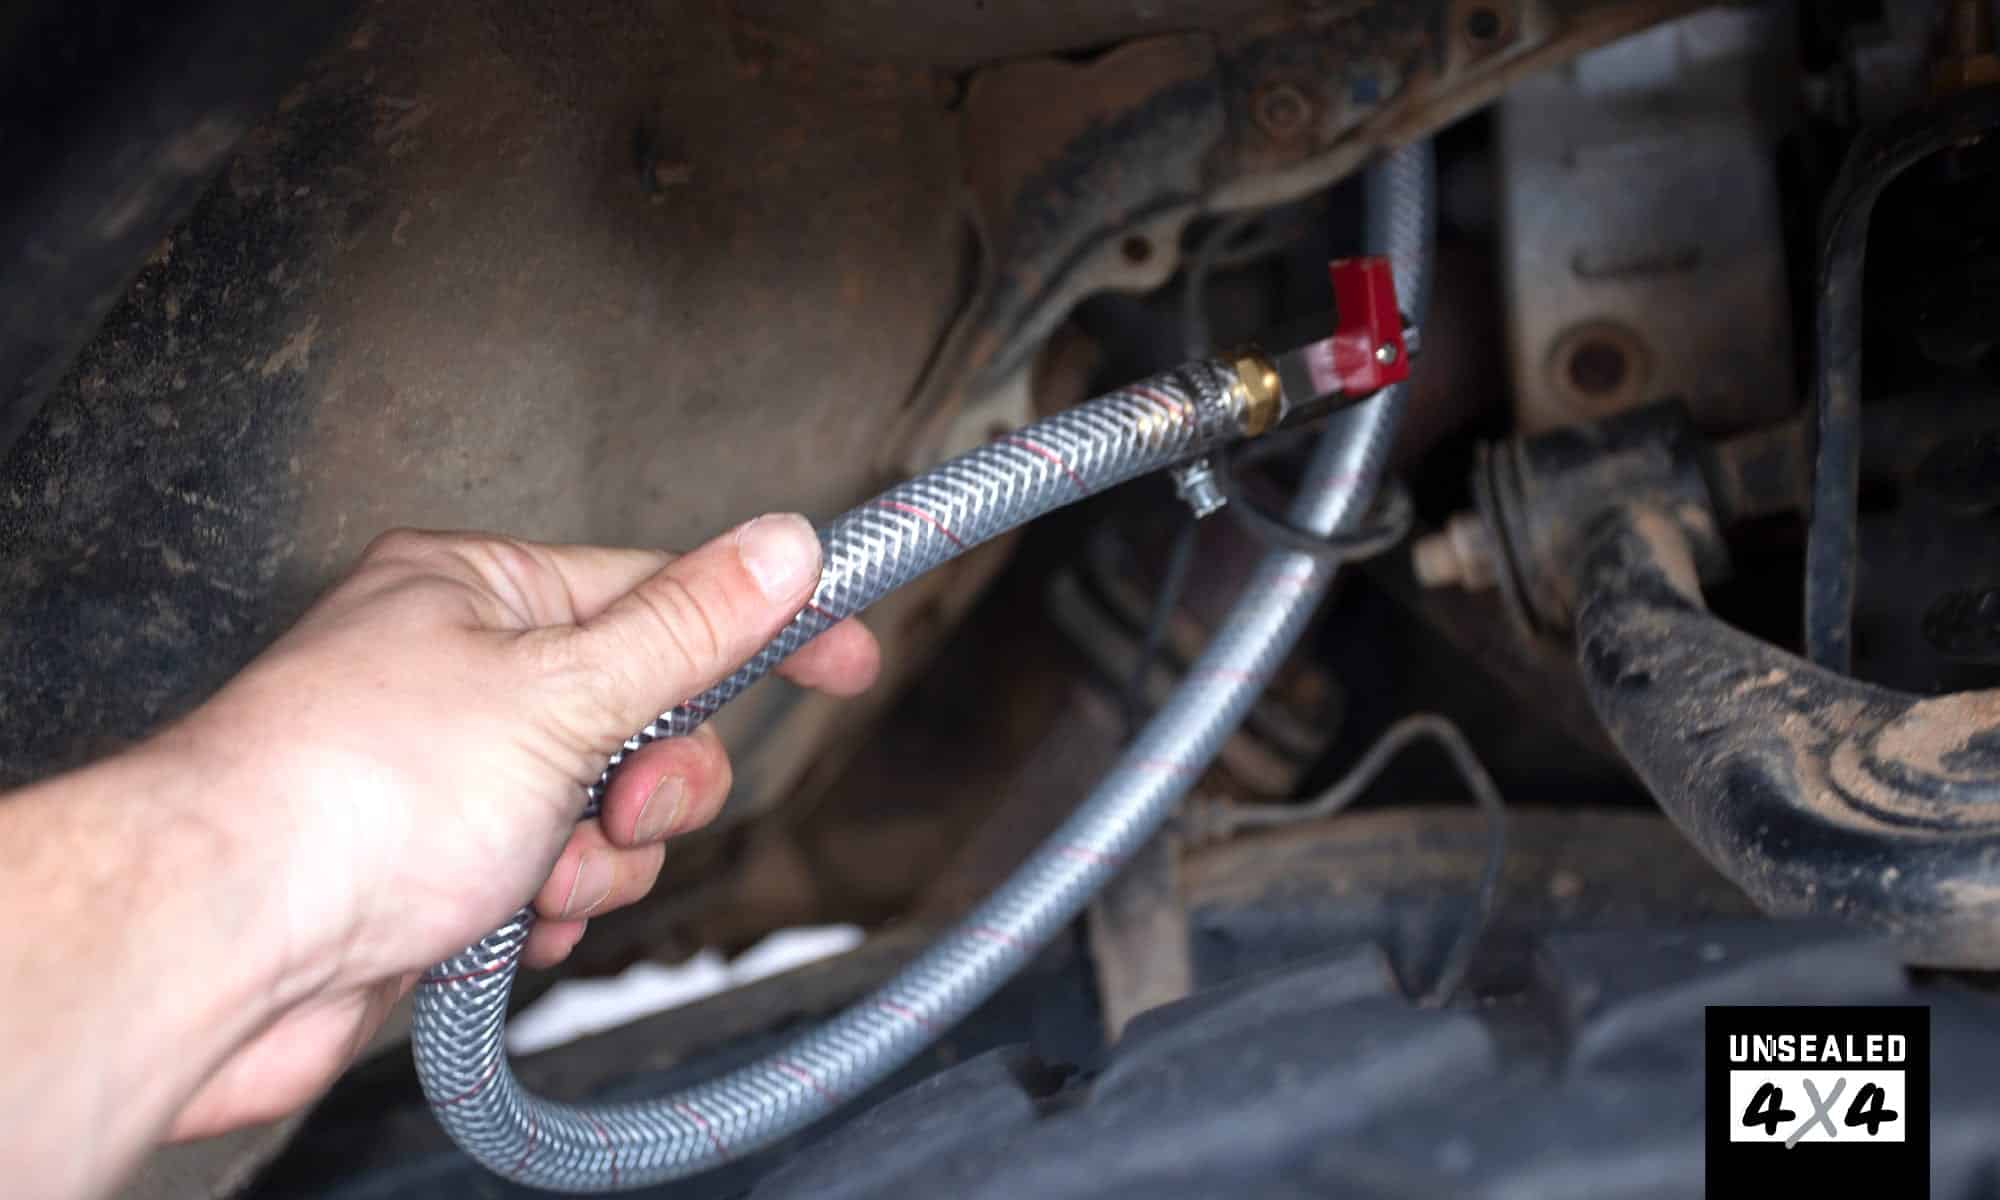
With that unbolted, it was a case of wiggling the old line and two hoses off; no need to keep any of it unlike other kits I’ve seen that require the use of the factory reduced hose on the turbo side. The supplied lines in this kit fitted perfectly. Honestly, it was easier than changing a radiator hose. Then you need to run the drain line to the inner wheel arch on the passenger side; spend time to get this right … I mucked up my first attempt at this, and decided to redo it for a neater fit. As long as you can drain the oil out and it’s not hitting anything it shouldn’t be hitting, you’ve won champion.
5. CHECK IT ONCE A MONTH…
This will vary depending on your vehicle and how heavily it’s breathing, but the supplied manual suggests checking and draining the catch can once a month. This is as easy as opening the release valve you ran earlier and collecting the oil into a bottle. I’ll keep this bottle for a few months, to ascertain how much oil my D4Detonate is (well, was) churning through the intake. As the motor only has 115,000km on it, I’m hoping there aren’t too many surprises. However, it is advisable to install a catch can as early into ownership as possible to avoid any intake manifold soot building from occurring in the first place.

LAST THOUGHTS…
All up, this took less than an hour from go-to-whoa, and is absolutely a task I would recommend you DIY. The kit cost under $400, so it’s certainly not the cheapest, but the way I look at it, I have the best quality piece of gear I was able to install myself, thus saving labour getting it fitted at a workshop. I’ll be sure to check back in and let you all know how much oil I pull out next month. For more information, click here.

