25 things to do on your 4X4 while social distancing
Right now, coronavirus is keeping us all at home, so we thought we’d come up with a list of jobs to keep you busy until this all blows over. COVID-19 has resulted in severe travel restrictions in Australia but there’s…
Right now, coronavirus is keeping us all at home, so we thought we’d come up with a list of jobs to keep you busy until this all blows over.
COVID-19 has resulted in severe travel restrictions in Australia but there’s still plenty of fun stuff you can do with your 4X4 while social distancing, or even if you’re in self-isolation. Check out our guide to keeping busy and keeping your spirits up.
Make sure you let us know what you’re up to on your fourby while you’re in isolation. Leave a comment below or hit us up on Facebook and share a pic with us.
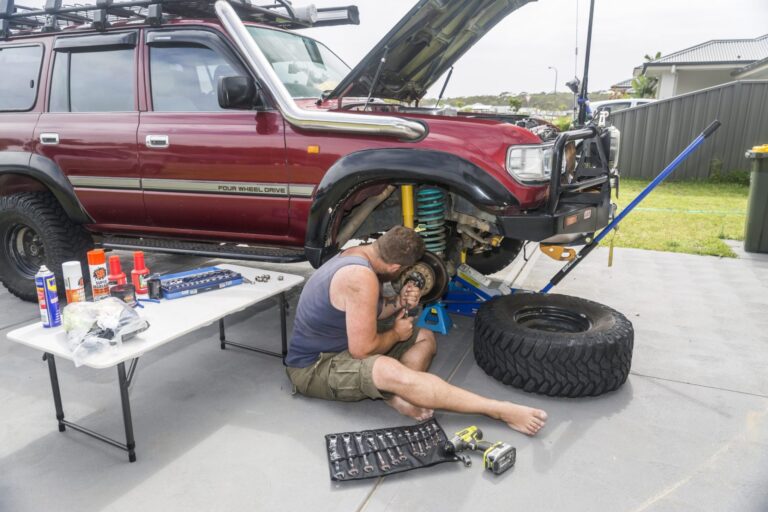
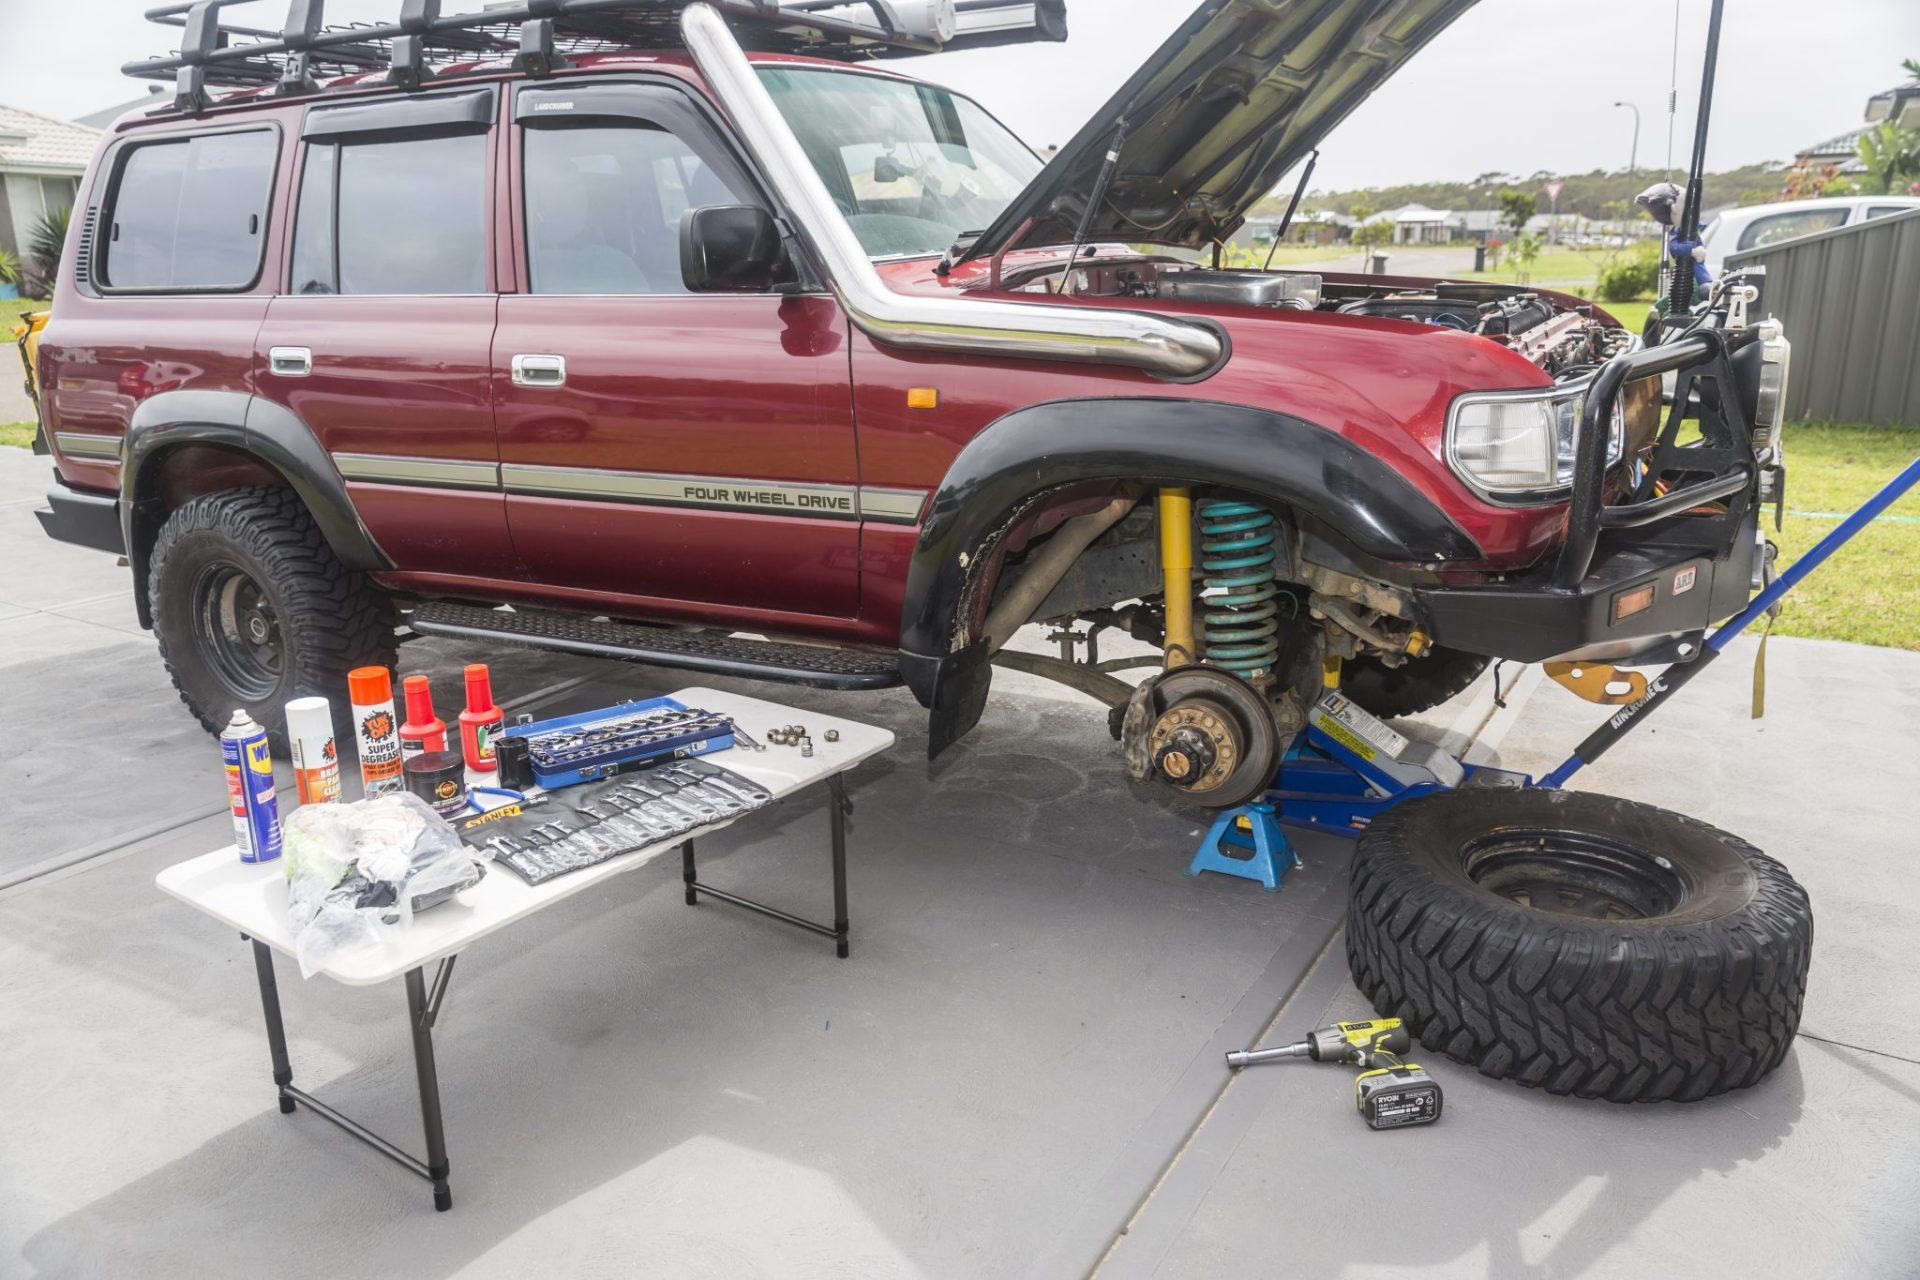
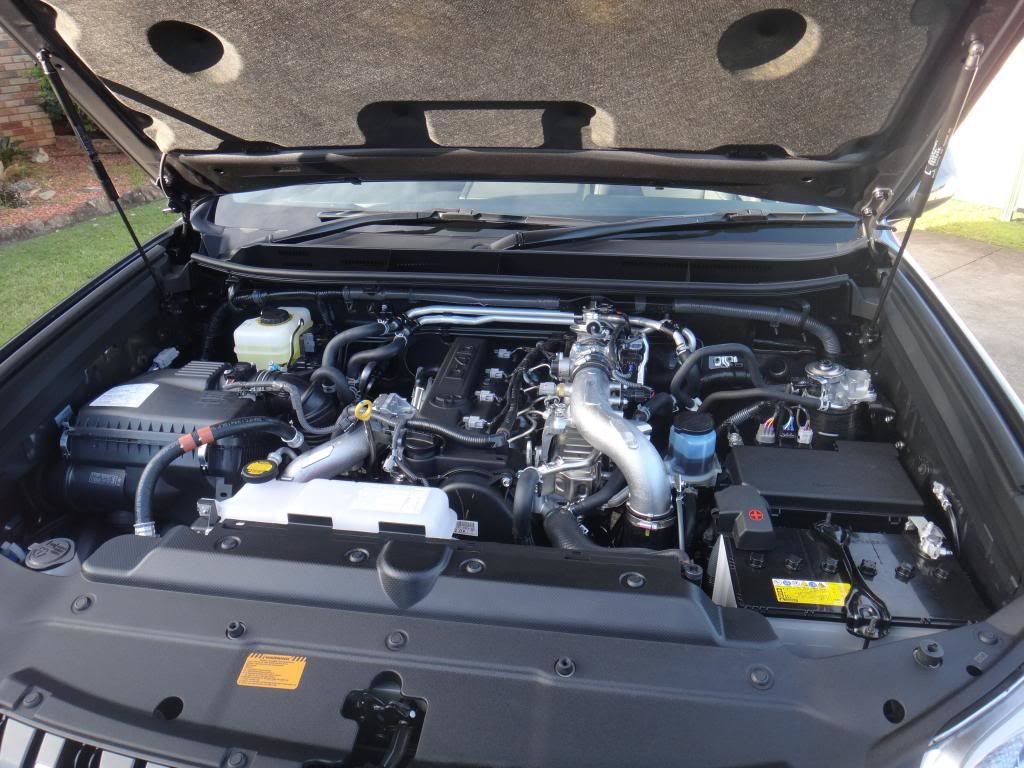
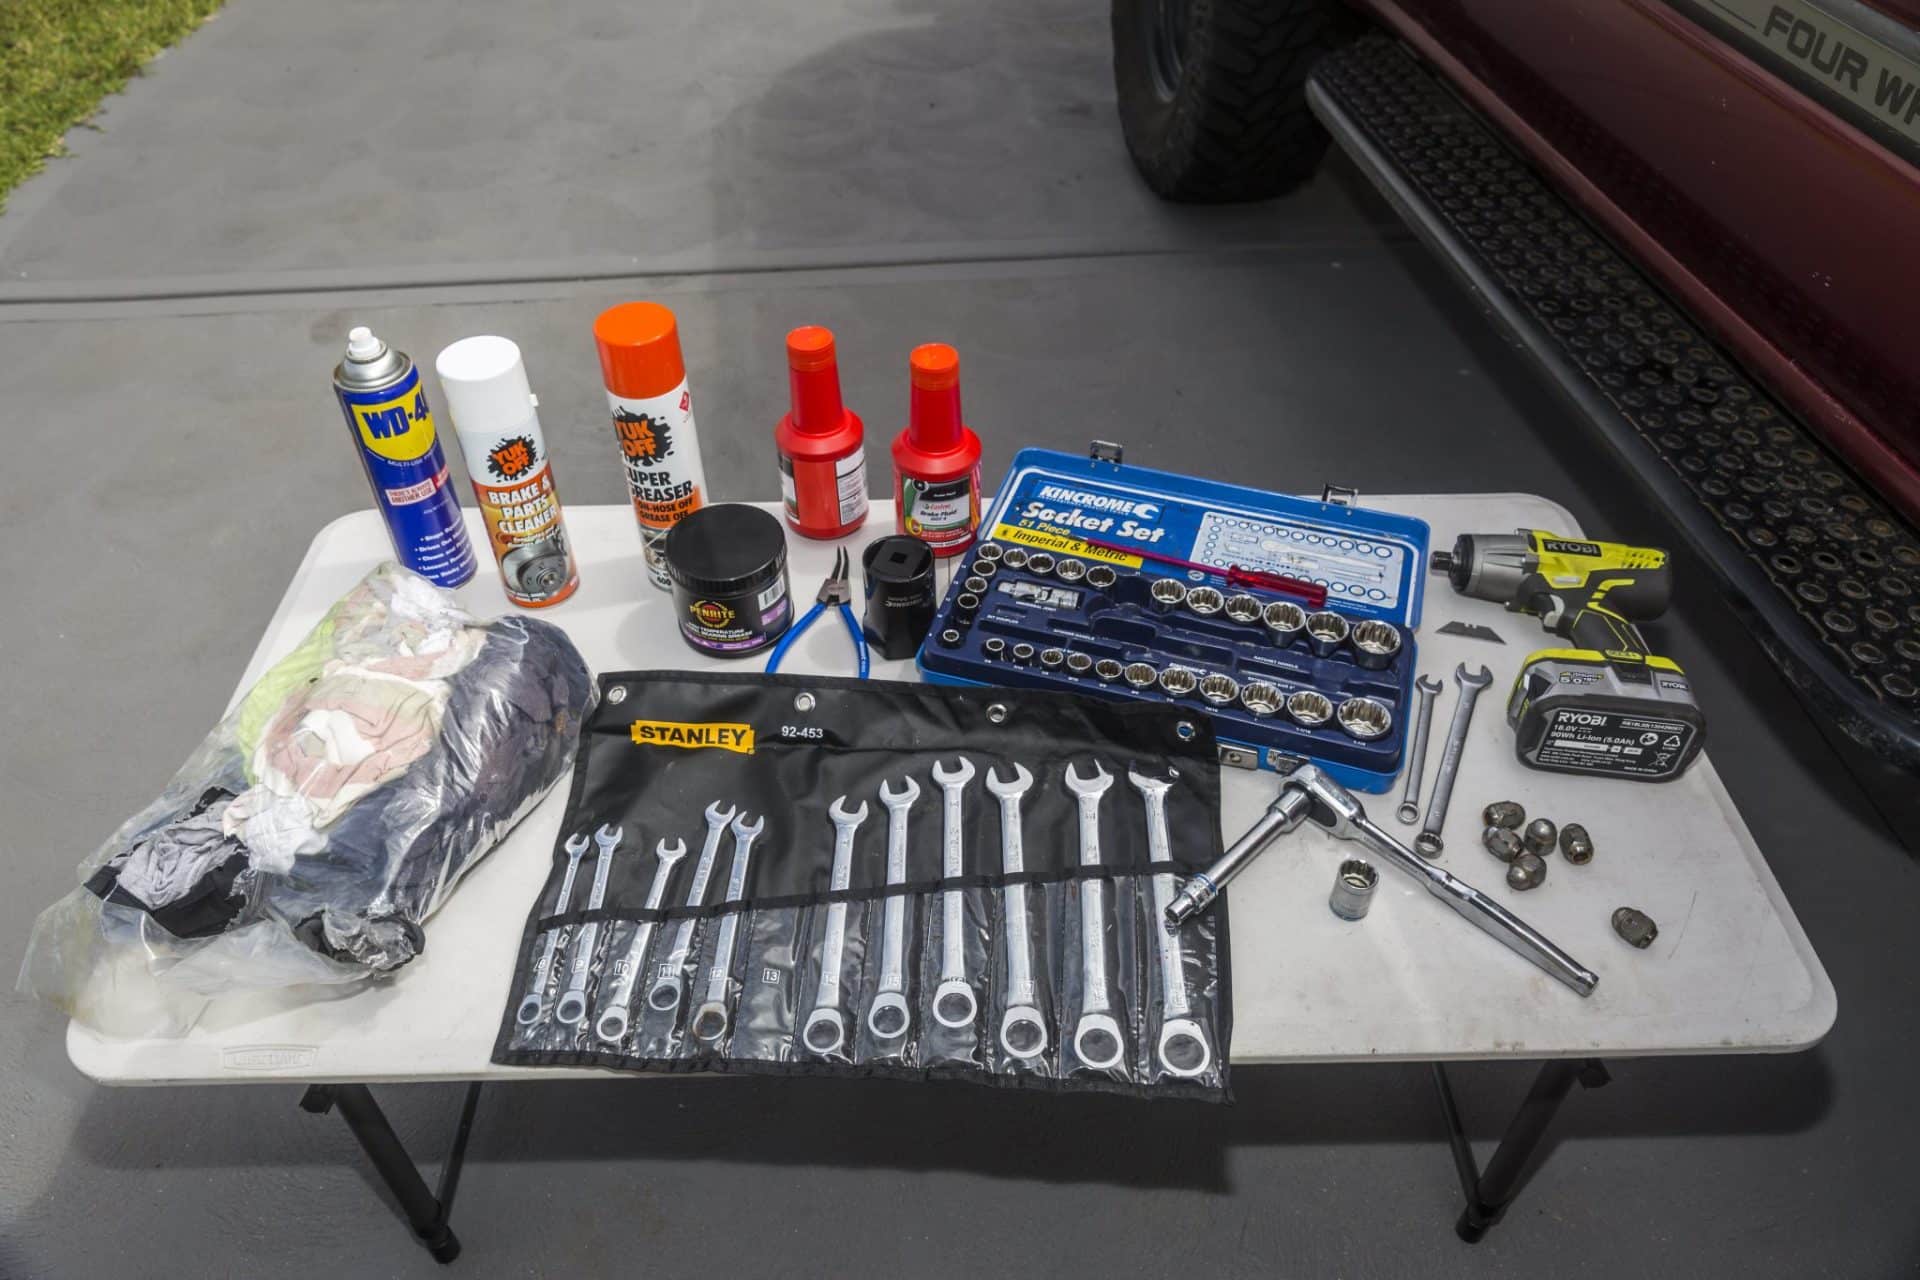
Service your 4X4
We’re usually all so busy driving our 4X4s to spectacular destinations all over Australia that we don’t always find the time to keep on top of maintenance so, with many borders closed and fewer places to travel to, now is a great time to give your pride and joy a thorough going-over. Start with the obvious stuff such an oil and filter change, check the air filter and clean/replace if necessary, replace the fuel filter, grab a grease gun and attack those nipples, drop the coolant and give the cooling system a flush, replace brake fluid and bleed the system… just get in there and do all those jobs you may have been putting off.
Tyre rotation
Tyre rotation is one of the best ways to extend tyre life, especially if you introduce your spare tyre into the schedule. Tyres can wear at different rates depending on their location on the vehicle and should be rotated every 10,000km or so. In the case of 4X4s, the tyre rotation sequence for four tyres should see the front left moved to the rear right, the front right moved to the rear left, and both rears moved forward without changing sides (see diagram). If you introduce the spare into the rotation schedule, move the front left to the spare position, the spare to the rear right, the rear right to the front right, the front right to the rear left, and the rear left to the front left… got it? Maybe just look at the diagram. While you’re at it, check all tyres for any signs of damage or uneven wear; the latter could be a result of running the wrong pressures or an issue with wheel balance/alignment.
Protection equipment
Bullbars, side rails, side steps and rear bars are your 4X4’s first line of defence and as such they are the components that usually cop the most damage when driving, both on the road and off it, so they can start to look a bit ratty after a couple of years fitted to your rig. Like any other component, protection equipment needs to be looked after, so with time on your side now is the time to give it all a proper tidy-up. Depending on how ratty your bar work is it might need a good clean and polish, or it might need to be removed and repainted. If your bar work just needs a good clean, make sure all the mounting bolts are secure and corrosion-free while you’re at it, and if you need to get out the spray gun, make sure you prep first by sanding back, removing all rust spots, treating them and priming before spraying on a few coats of paint. This isn’t a huge job but it can have a huge impact on the look of your rig.
Bush pinstripes
Just about everyone who drives a 4X4 knows that bush pinstripes are part and parcel of off-roading. While some wear scratches as a badge of honour, others reckon they make their 4X4s look a bit second rate, so now’s the time to buff them out. There are several products and methods to rid your shiny rig of its bush pinstripes, and which ones you use will depend on your vehicle’s paint finish and how deep the scratches are. Most vehicles have three layers of paint – primer, colour and clearcoat – and if a scratch isn’t too deep it will just impact the clearcoat, which can usually be buffed out by hand using a cutting compound and then polishing. If the scratch is still visible you can then have a crack using a powered polisher (or drill attachment) and a cutting compound, and if this doesn’t work you may have to lightly sand the clearcoat by hand, apply a rubbing compound with a powered polisher, and then a polish with a powered polisher. If the scratch is still visible there are two more options: leave it or paint it.
Vehicle wiring
Making sure your 4X4’s electrical system is in tip-top condition is of critical importance. As Wes Whitworth recently pointed out in Unsealed 4X4, the single most crucial component to keeping our four-wheel drives safe is fuses, so make sure all of your 12V accessories – fridges, lights, UHF radios, etc. – have a fuse between them and the vehicle’s battery. The next thing to look at is insulation; driving on corrugations and bouncing around off road can cause the insulation on wiring to wear through, so make sure there are properly fitting grommets where wiring is fed through holes such as in the vehicle’s firewall, and use split flexible-tube conduit to protect 12V wiring. Finally, make sure wiring is properly routed and secured so that it won’t foul on moving components.
Interior refresh
Once you’ve freshened up your 4X4’s bar work and buffed out the bush pinstripes, turn your attention to the interior. Have a look above you and see if the headlining needs a clean or if its sagging; pull the seats out so you can get into all the tiny crevices where chip crumbs and long-lost lollies are lurking; pull out the carpet and give it a decent shampoo, and do likewise with the seats; unscrew the centre console and clean out all the dust and evidence of spilt coffees; get stuck into trim components such as door trims, consoles and the dashboard with an appropriate cleaner; and clean the inside of the windows and the windscreen. For those with older, noisier 4X4s, consider installing some sound insulation while the seats and carpet are out. Once you’re able to hit the tracks again you’ll feel like you’re driving a new 4X4.
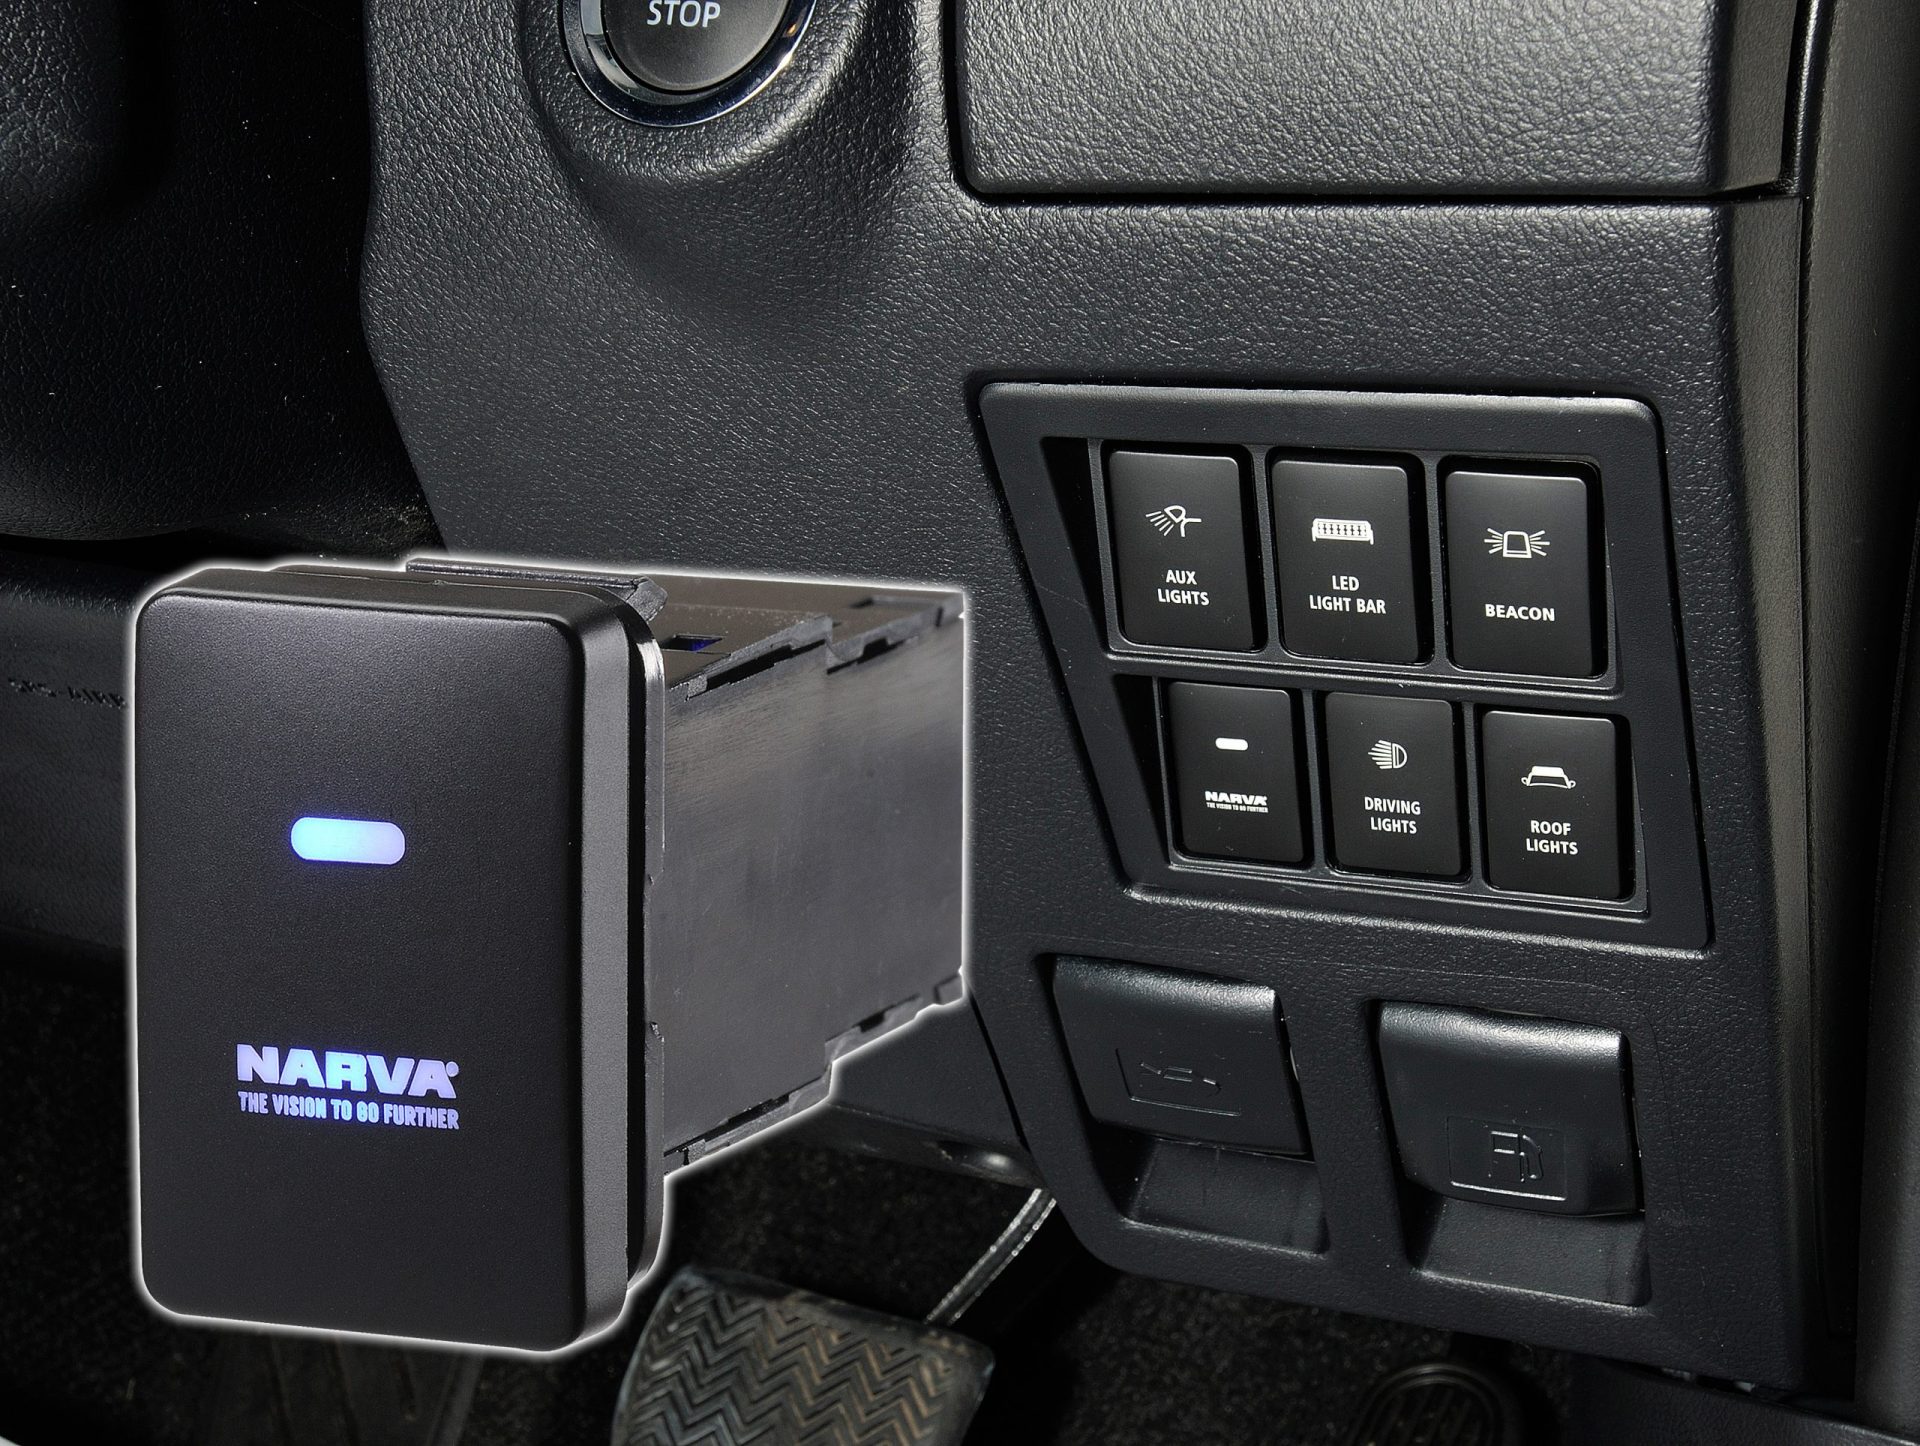
New switchgear
Is your vehicle’s dash covered in mismatching switches from all the accessories you’ve fitted over the years? If so, now’s the time to flick ’em and consolidate. There are a few options when it comes to upgrading switches, from sourcing separate but matching switches to installing a switch panel. The advantage of upgrading individual switches is you probably won’t have to reroute wiring; while the advantage of fitting a switch panel is all your switches can be accessed from the one spot. Some panels include features such as circuit breakers, backlighting, voltmeters and power outlets. If you fit a switch panel make sure it’s from a reputable manufacturer.
Narva OE Switch Application.
Check your winch
Will your winch work when you really need it? The best time to find out is now, when you don’t really need it. Sitting out the front of your vehicle, your winch is likely to get pretty dirty, even if you rarely use it, so make sure you clean it after you’ve been four-wheeling, especially in mud. As well as clearing debris and mud away from the cable-rope and around the drum, check that the securing bolts are tight and ensure the power cables are secure, corrosion-free and not like to snag on anything. Wearing gloves, spool out the winch cable/rope and check it for damage. In cables looks for kinks, corrosion and frayed wire strands, while in synthetic ropes look for cuts and abrasion damage and replace if necessary. Neatly wind the cable/rope back on to the drum under load, then ensure that the winch operates correctly in both directions. Also check that the winch hook is properly secured and in good condition. Now go have a look at all the gear in your recovery kit and make sure it’s also complete and in good nick.
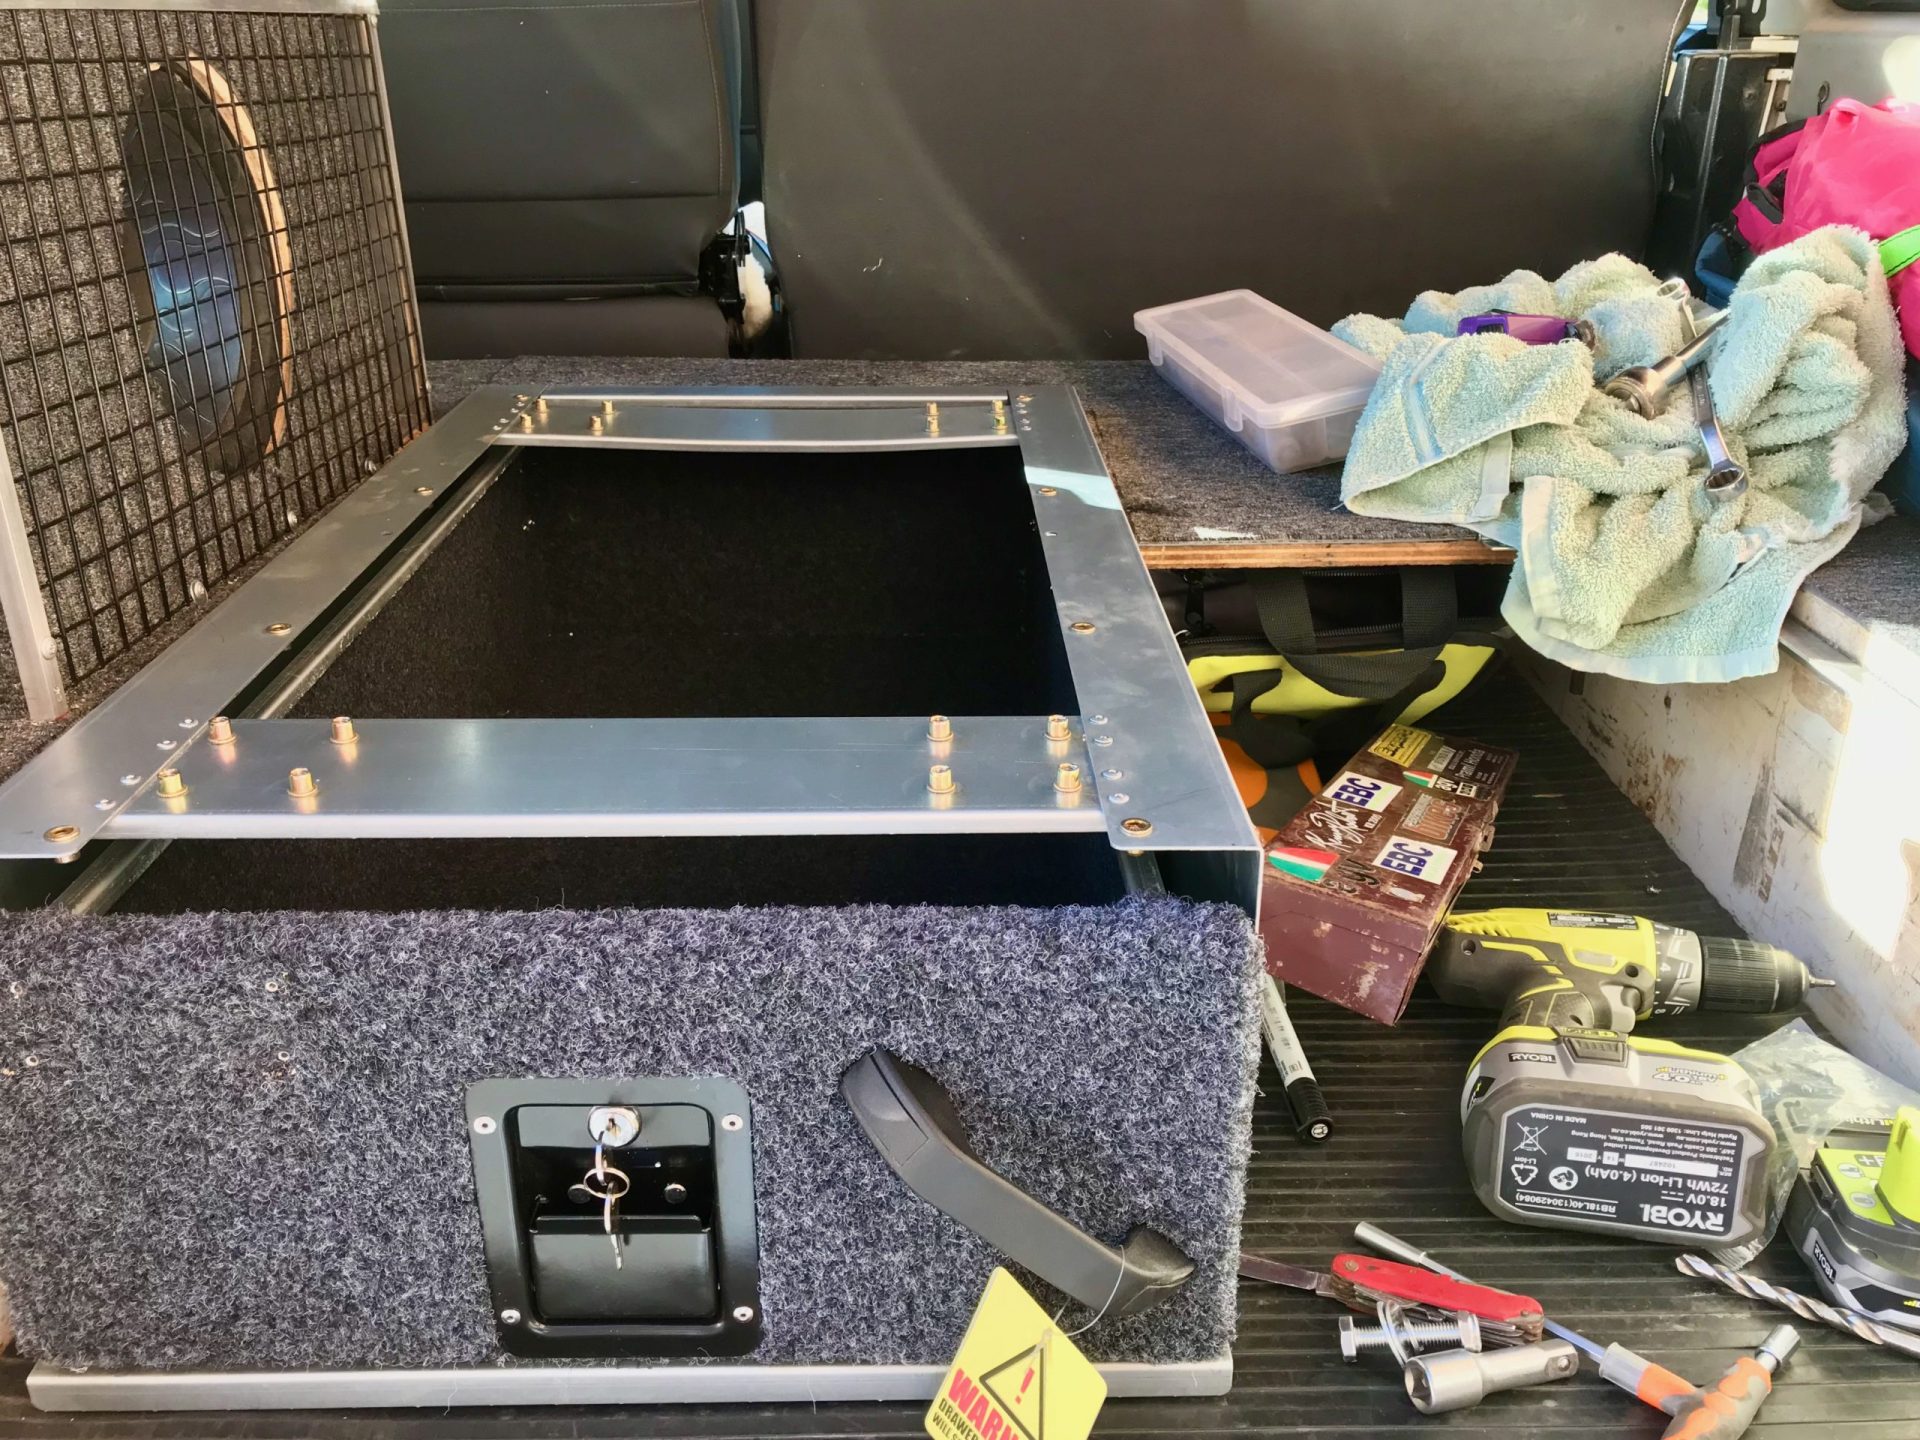
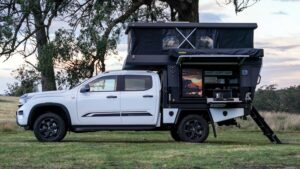
New rear set-up
If you’re not happy with the way the back of your 4X4 is set up, now’s as good a time as any to hit the reset button. Have a good think about the current set-up and figure out how to fix/change things that bothered you the last time you went four-wheeling/camping. Regardless of whether you drive a wagon or a ute – and if a ute whether it has a tonneau, hard-lid, canopy or service body – easy access to stuff will make life much more pleasant the next time you’re out on the tracks. Have good think about what will best suit your needs and figure exactly what you need, such as a new drawer system, a fridge drop slide, a fridge cage, a cargo barrier, an accessories panel, power outlets, work lights, awnings… the list is almost endless. Take your time when planning your set-up rather than just rushing in and fitting new gear.
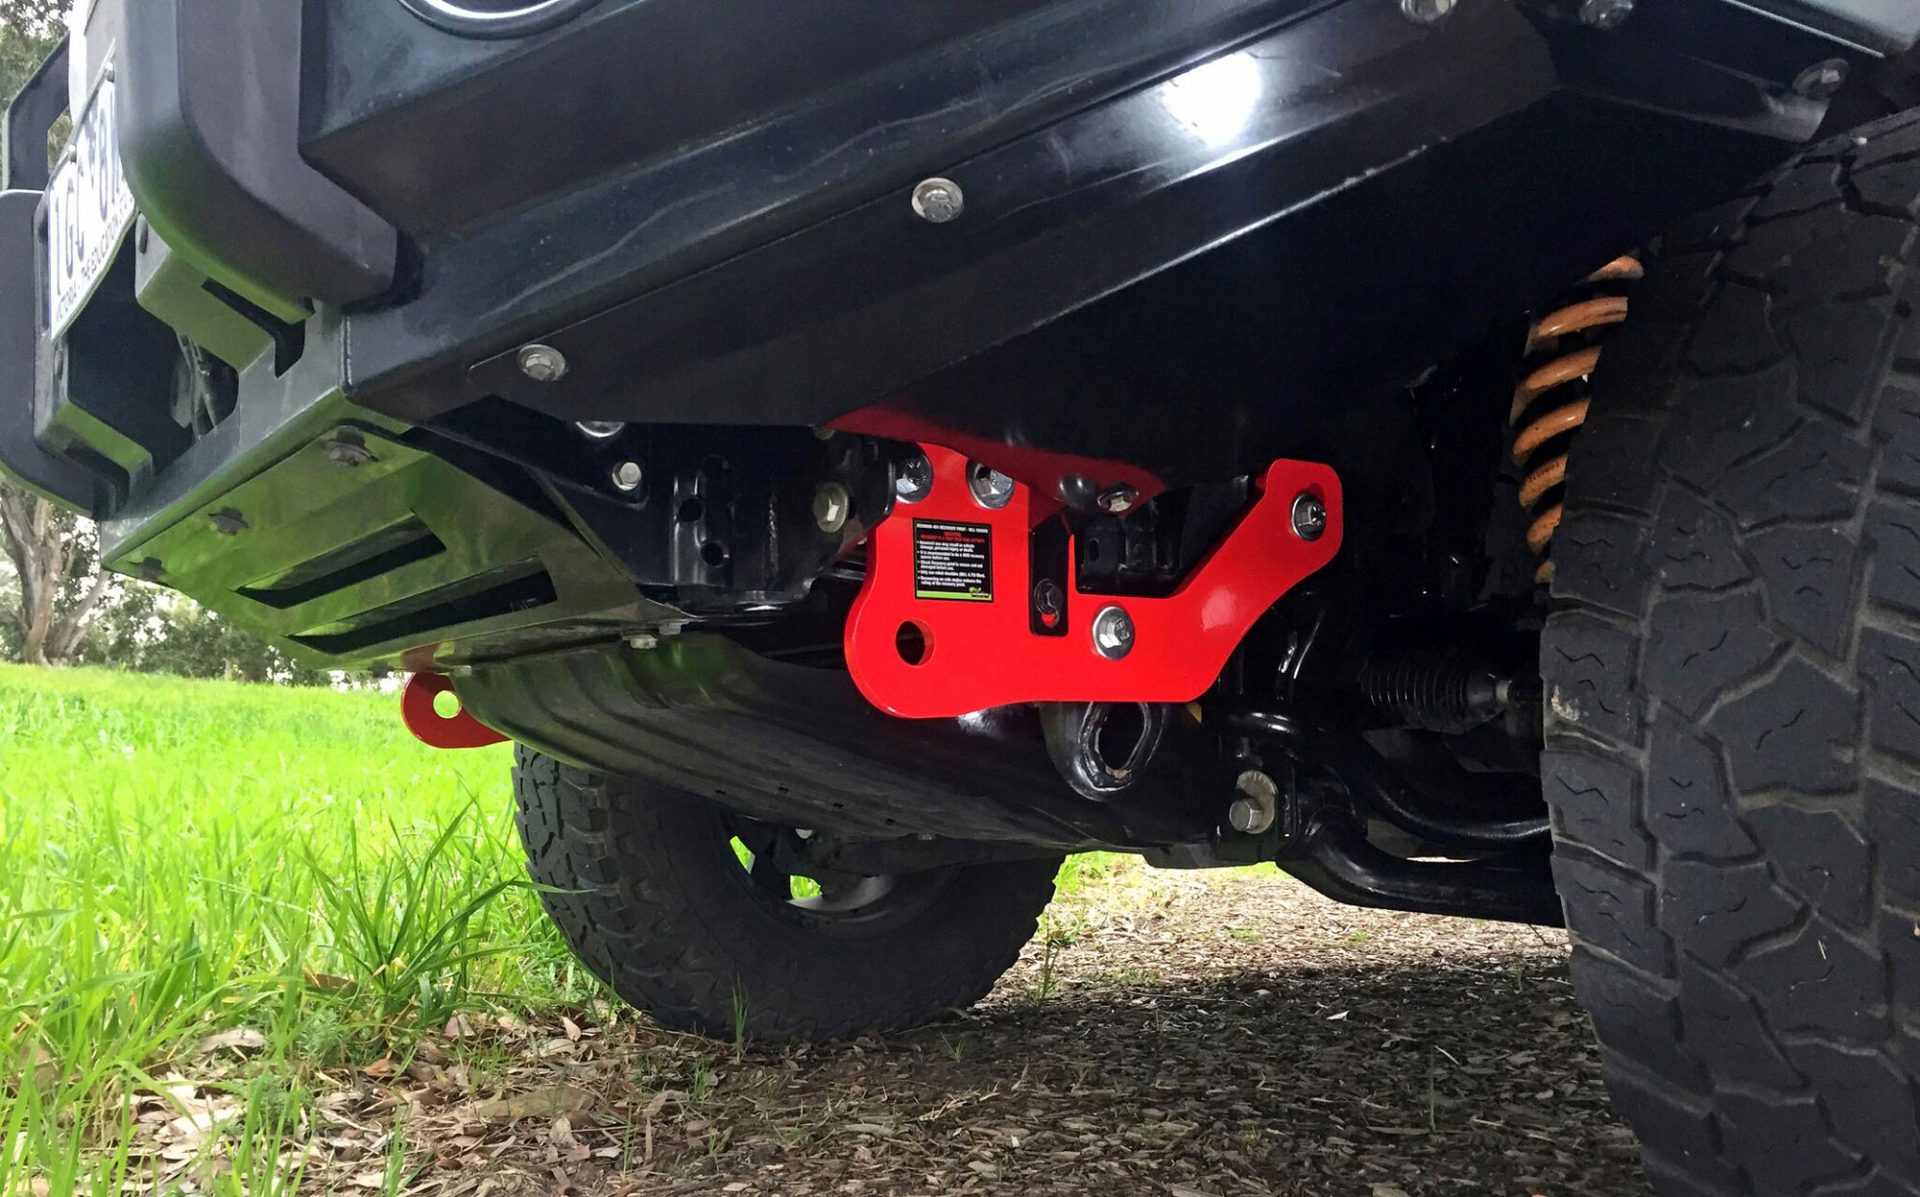
Recovery points
Is your vehicle fitted with rated recovery points and, if so, are they easy to access and in good condition? If the answer to either of these questions is no, then now is a good time to remedy the situation. Not to be confused with vehicle shipping points, rated recovery points attach directly to the vehicle’s chassis and most are designed to accept rated shackles up to 4.75t. While some recovery points are engineered to handle lateral loads, others are only designed for a straight-line pull, in which case you should fit two up front so you can spread the load across the vehicle by using an equaliser strap. At the rear, if you have a 50mm hitch receiver, you’ll be able to slide in a rated recovery hitch, which is specifically designed to accept a rated shackle. As you all know, NEVER place a recovery strap over a tow ball. If your vehicle doesn’t have a hitch receiver, you should be able to source rated recovery points that can be affixed directly to the chassis as per the front of the vehicle.
Diff breathers
Your vehicle’s differentials heat up while driving and pressure builds up inside them, so they are equipped with a one-way valve (breather) that allows that pressure to be alleviated. If the diffs are suddenly cooled, as happens in water crossings, the pressure inside reduces, creating a vacuum, so they will want to suck in water. The factory breathers (sometimes, but not always, located high up in the engine bay at the end of extension tubes) are designed to prevent this, but even if the one-way valves operate as they should, the vacuum inside the diffs can still result in water being sucked in through other points such as axle oil seals. The best way to prevent this is to equalise the pressure inside and outside the diffs, which can be achieved by replacing the factory one-way valves with aftermarket diff-breathers. Instead of a one-way valve, these have a special filter at the end of extension tubes to let air in and out, but still stop water from getting in. There are several quality kits on the market and they also include breathers and extension tubes for the gearbox and transfer case.
Bonnet struts
It’s surprising how many 4X4s have a heavy bonnet supported by a fiddly stay that needs to be unclipped and poked through a small hole whenever you want to top up the washer bottle. This set up is inconvenient at best and downright dangerous at worst, especially if you’re sliding around in the mud with a winch extension strap under one arm and a winch remote in the other, trying to access an under-bonnet isolator switch. Solution? Fit a pair of gas struts. There are several gas struts on the market designed to fit most popular 4X4s and as well as aiding convenience they reduce or even eliminate the effort required to lift a bonnet. Most use existing mounting points and are supplied with all necessary hardware. Installation is quick job that you’ll appreciate every time you need to lift the bonnet.
Under-bonnet light
If you need to don a headtorch every time you want to check your 4X4’s engine oil level, perhaps it’s time to install an under-bonnet light. While you could just attach a portable magnetic LED light to the underside of the bonnet, with time on your side you might as well go the whole hog and fit a dedicated LED strip light attached to a pressure switch so it comes on every time you lift the lid. LED strip lights are cheap, bright and easy to fit… and they’re also available in a variety of colours. Get one that has a yellow-light function so you can keep the insects at bay the next time you’re poking around under the bonnet at night.
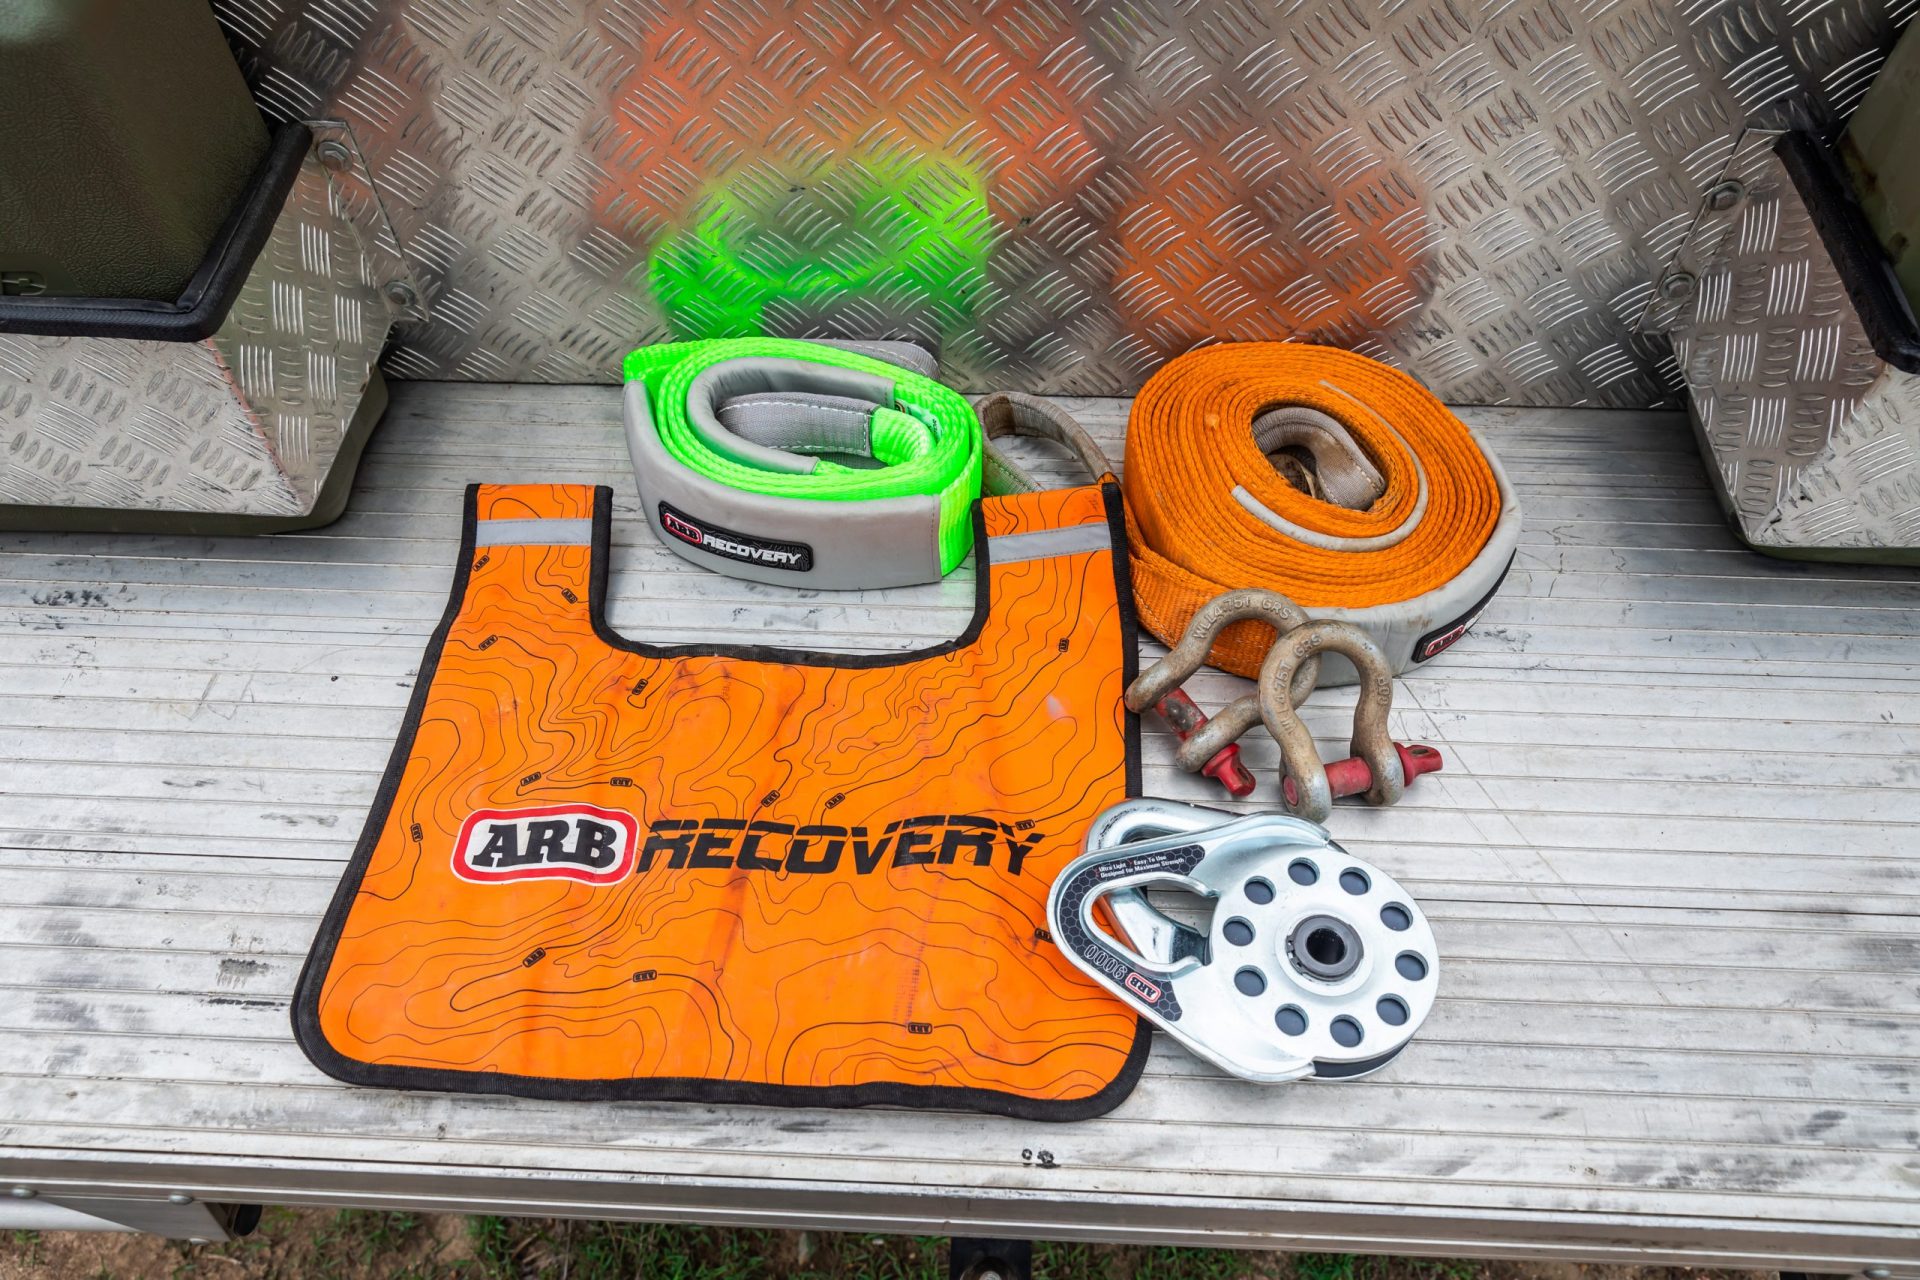
Recovery Gear
What state is your recovery kit in? Chances are it’s not great as the only time it probably sees the light of day is when it’s expected to perform in tough conditions, copping serious abuse and getting thrown back into its bag or case. Now’s a good opportunity to drag it out and make sure it’s all there and in serviceable condition. Unfurl straps and ropes and examine them to check for damage, such as cuts and abrasion, and replace if necessary. If they’re undamaged but dirty, soak them in warm soapy water, rinse them off and let them dry thoroughly before rolling them up and packing them away again. Check all your shackles and snatch blocks/winch rings too, and make sure you have a cable damper and a decent pair of gloves in there.
Battery monitor
The best way to check the level of charge in a battery is by glancing at a battery monitor, not by listening to the slowing drone of a starter motor on a cold morning. Fitting a battery monitor is a simple job, so you’ll probably spend more time researching the right one than you will performing the actual installation. If your vehicle is equipped with a dual-battery system, make sure you fit a monitor with dual voltage displays. If you don’t want to be bothered routing wires from the battery to the monitor, there are several wireless units on the market; simply connect to the battery, download the relevant app and connect to your phone via Bluetooth. It really is a five-minute job. As well as displaying the current voltage, many wireless monitors will also display charging voltage, record trip duration and store and display battery performance history. And for those with auxiliary batteries, most apps can display the information from several monitors.
Fridge barrier
If your portable fridge is mounted to a fridge slide, fitting a suitable fridge barrier will offer several benefits. Firstly, it will stop luggage and other gear from falling in behind the fridge every time you slide it out, and it will prevent that gear from damaging the fridge itself. In addition, fridge barriers give you somewhere handy to route the power cable so it doesn’t get tangled, they allow you to pack more gear in the back of your rig (right around the barrier as well as on top of it), and they ensure there’s always enough space around the fridge for ventilation so it will work efficiently. There are several fridge barriers on the market or, if you’re handy on the tools, you can knock up your own fridge barrier.
Airlines
No matter where you’ve mounted your in-vehicle air compressor, chances are you’ve got to open the bonnet, lift a canopy door or unlock a toolbox to access it. How about making life a little easier next time you need to air up by running airlines to the front and rear of your vehicle and fitting quick-release fittings. While you’re at it, hook up an in-cab on/off switch and then the next time you drive off the beach airing-up will be a doddle. And with an outlet at each end of your vehicle it’ll be easier to reach trailer tyres or even lend your mates a hand.
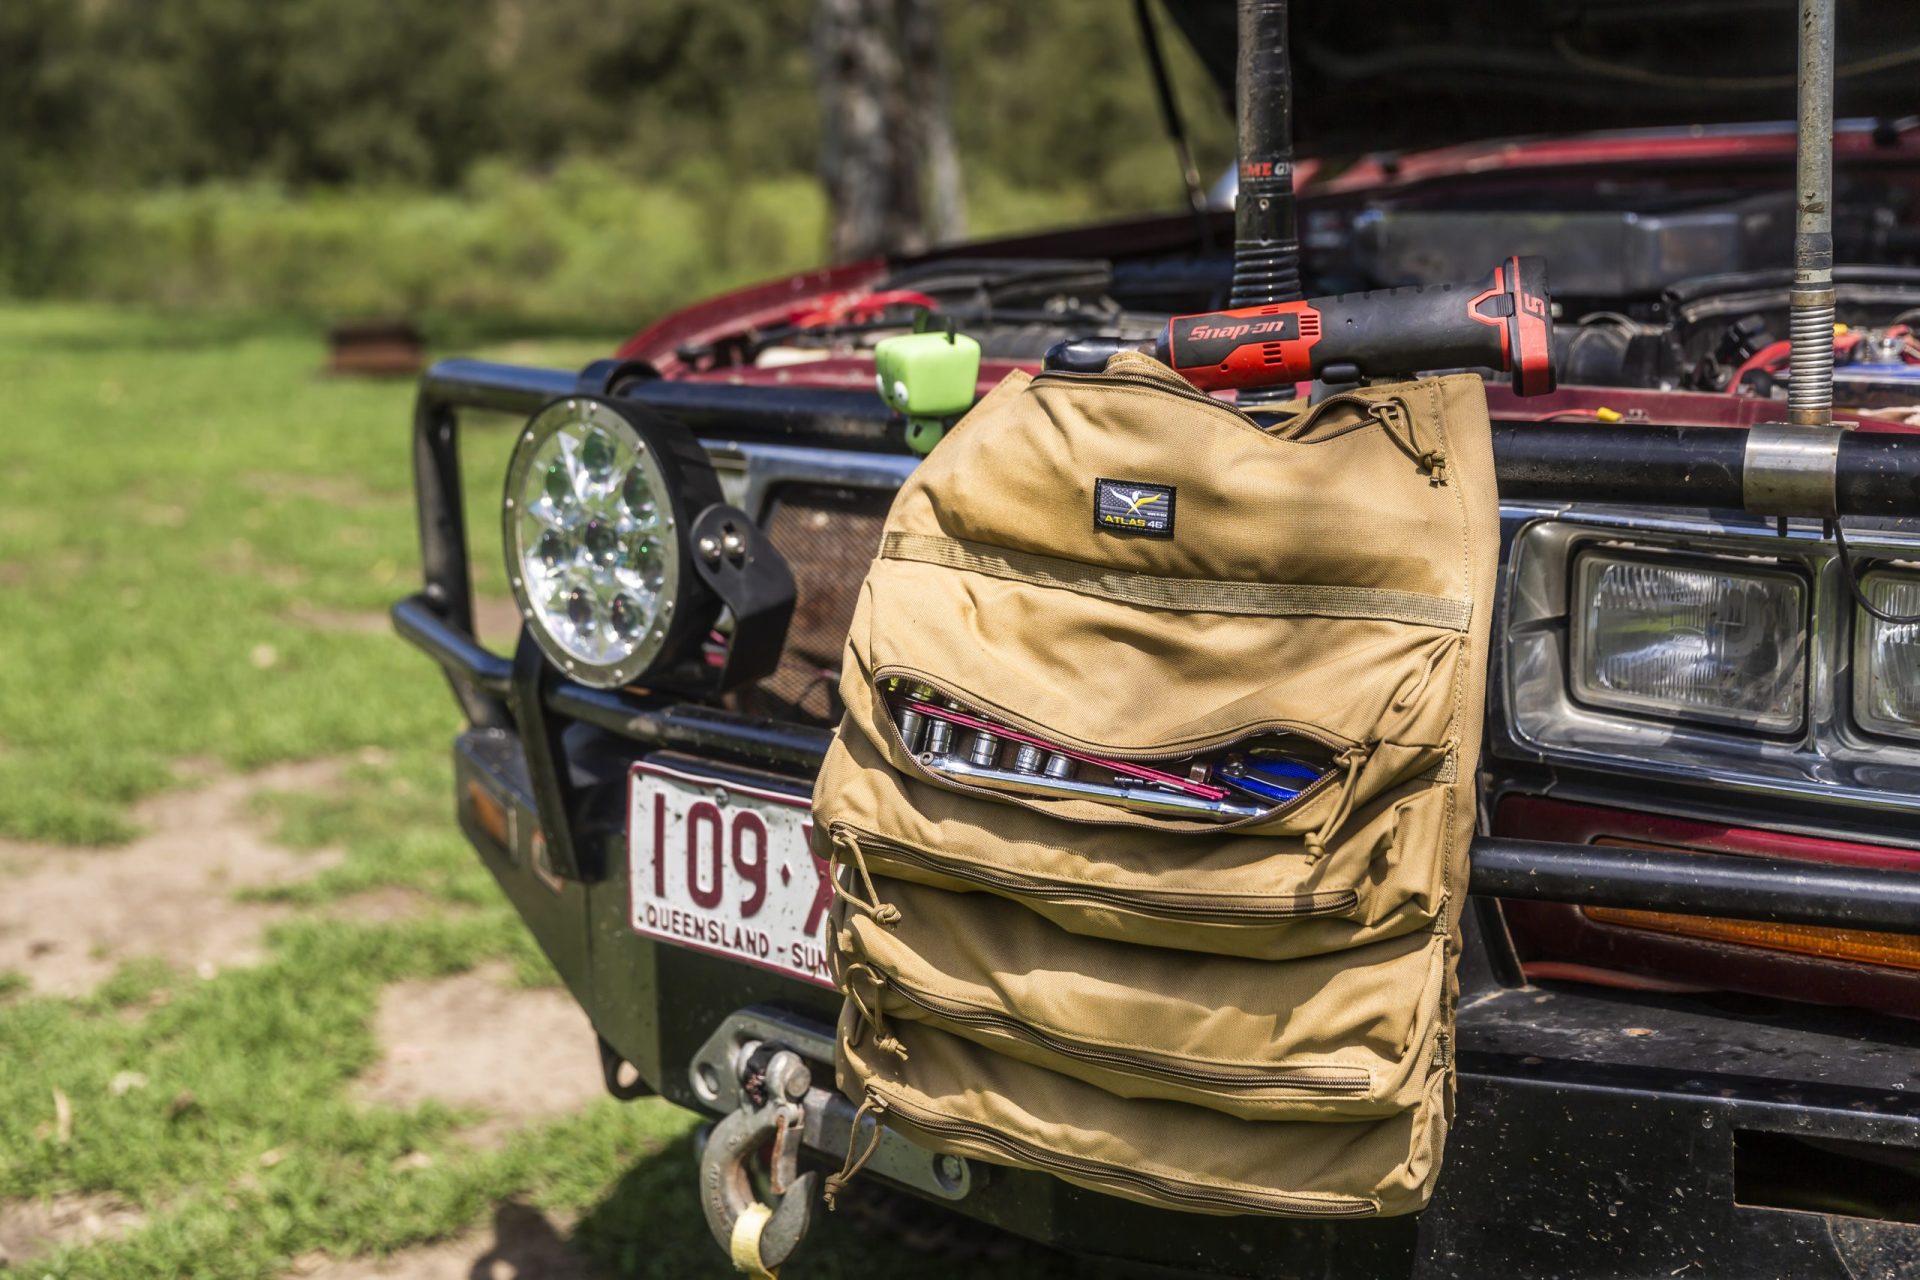
Toolkit
When was the last time you checked out the toolkit in your 4X4? Chances are it was when you needed it… and then the tools were all (hopefully) thrown back in, covered in a film of grease, oil and dirt. Now’s a great time to drag out your toolkit, go through all the contents, organise it and make sure it’s all there. While you’re at it, give all the tools a good clean and make sure you don’t have any unnecessary doubles (other than 10mm sockets) that are doing little more than weighing down your rig.
Spares
You might be parked up in the garage for a while but, when all the tracks and borders open again, you’ll want to be sure that your spare-parts kit has everything in it you might need. First up, make sure all the consumables are present and accounted for such as oil, transmission fluid, coolant and fresh brake fluid, and make sure you have spare air, oil and fuel filters. Other stuff you might need for longer trips includes accessory (fan) belts and coolant hoses, or at the very least a coolant hose patch kit. Finally, make sure you have a comprehensive electrical kit, with spare fuses, wire, insulation tape, connectors, side cutters, crimping tool and test light or multimeter.
Tyre repair kit
Have a look in your tyre repair kit and make sure everything is there. Are there enough plugs? Are there enough patches? Is there enough rubber cement and is it still useable, or is it as hard as a rock? Also check to see if you have plenty of valves and dust caps, and that all the tools are there including the reamer, insertion tool, pliers and blade. If you’re planning a longer expedition-style trip when the country reopens, you’ll also need some tyre levers and a bead breaker, such as some Tyrepliers.
Realign driving lights
There are several ways that driving lights can go out of alignment, whether from working loose on corrugated roads or from copping a knock when driving in the scrub, so self-isolating presents a great opportunity to point them back where they belong. There are a few methods to align their driving lights and we reckon the best one is to head out at night, find a long and quiet stretch of road, light it up and aim the lights where you think they provide the best benefit. If you’re locked down at home, however, there is another method; measure the distance between the centre of the driving light and the ground, mark this height up on a wall (with tape) about 8m away, and aim the hot spot of the driving light about 40mm below this line.
Tie-down points
Except for a few rare exceptions, the cargo tie-down points in most modern 4X4s (wagons and utes) are pretty dismal. Some wagons have little more than plastic hooks in the cargo area while many utes have wall-mounted loops in their tubs that are positioned too high to be of much use. If you’re sick of gear sliding around in the back of your rig then now’s the perfect time to fit some decent cargo tie-down points. There are several options when it comes to individual lashing rings as well as adjustable anchor track tie-down points. Flush-mount lashing rings will ensure gear doesn’t get snagged when loading and unloading, while anchor tracks offer load versatility, because you can easily and quickly move the lashing rings to suit different loads. When installing, use pre-existing holes where possible, but if you have to drill make sure you don’t hit any vitals such as the fuel tank or any wiring, and prime and paint holes before sending bolts through them, and fasten with lock nuts.
Camping gear
Sure, none of us can go camping right now, but there’s nothing from stopping us setting up the tent or swag in the backyard and checking that’s it’s in good nick and ready for the next adventure. Look for any obvious damage such as rips and tears in flyscreens and canvas, and if you find any get your hands on a patch kit and fix it up. Check, clean and repair all your other camping gear such as fridge, cooker, water containers, camp furniture and sleeping kit. Make sure your plates, cups, utensils and the like are all clean and ready to go when everything opens up again. And while you have everything out, there’s nothing to stop you from camping in your own backyard.
Out of sight
A few weeks in lockdown provides the perfect opportunity to thoroughly clean the underside of your vehicle and have a good look around. Get right in there and clear mud and debris out of the chassis rails and apply a good dose of elbow grease to other components. While you’re at it have a good look for fluid leaks from the engine, gearbox, transfer case, diffs, shock absorbers, fuel tanks and water tanks. Also keep an eye out for any loose bolts on items such as bash plates, side rails, suspension components and the like, and check the condition of bushes and rubber boots on CVs etc. Also inspect under-vehicle wiring to make sure it’s all tucked up, out of the way and well secured.
Take it all in
There are hundreds of other fun things you can do with your 4X4 while social distancing but we reckon just a handful of items on this list should keep you occupied for some time, so once you’ve worked your way through it we strongly recommend you sit back and admire the awesome beast before you, because chances are your 4X4 is now as primed to get back out on the tracks as you are.